How to Build a Fire Pit Patio for Under $300: Stunning DIY Results
A fire pit patio can turn unused yard space into a comfortable place to gather, but poor planning can lead to wasted money, uneven pavers, or unsafe fires. You can create a polished outdoor area without paying contractor prices.
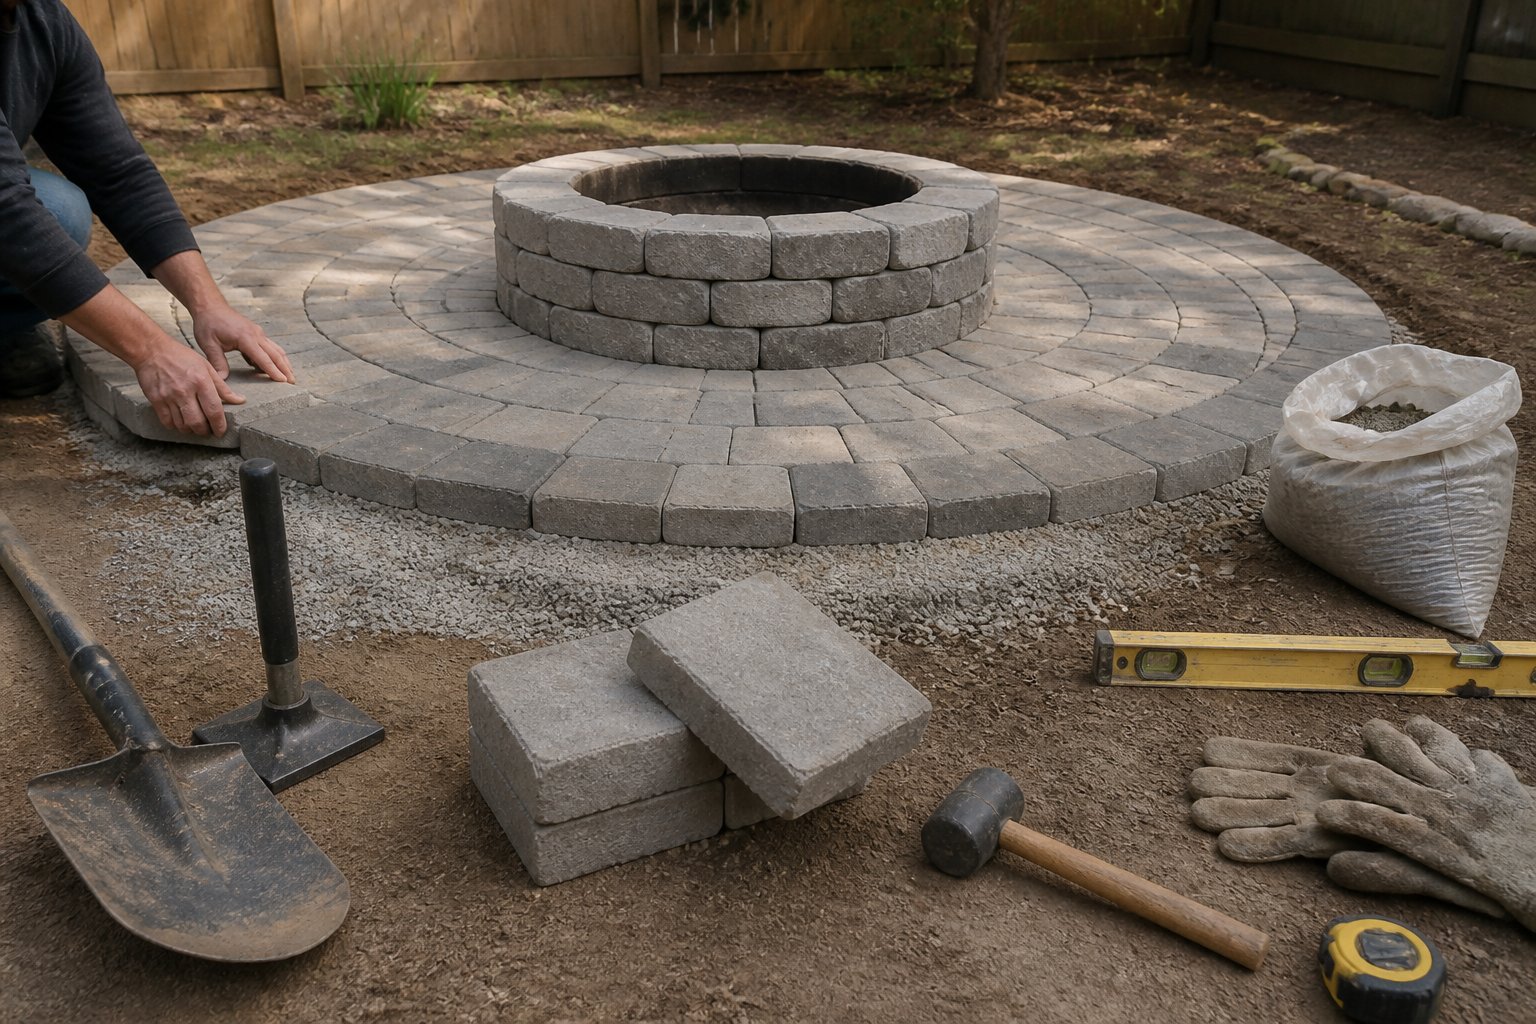
You’ll learn how to plan, build, and protect a fire pit patio for under $300 while keeping the layout stable, practical, and safe. The guide covers site selection, local rules, ground preparation, budget materials, paver installation, and long-term care.
1) Choose a safe, level location at least 10 feet from structures and overhanging branches
Start by checking local fire rules and any HOA requirements before you mark the patio. Choose a flat, well-drained area at least 10 feet from your home, fences, sheds, and other structures. Keep the fire pit away from trees, low branches, power lines, and roof overhangs.
Walk around the spot at different times of day. Smoke may drift toward doors, windows, or seating areas when the wind changes. Avoid placing the pit on a wooden deck, dry grass, or loose soil that could shift under the patio.
Mark the planned patio with rope or spray paint, then check that you have room to walk safely around the fire pit. Use gravel, concrete, or pavers for the surface; level, nonflammable bases provide better stability. Clear leaves, mulch, and other dry materials before construction, and keep branches well above the fire.
2) Check local fire regulations and obtain any required permits
Before buying materials, check your city, county, or local fire department rules for backyard fire pits. Regulations may limit the pit’s size, fuel type, location, or use during dry weather. Local fire-code guidance notes that some areas require permits, while others restrict or ban wood-burning pits.
Ask whether you need a construction permit, burn permit, or approval for a permanent structure. Confirm required clearances from homes, fences, trees, sheds, and property lines. Rules can change by neighborhood, so do not rely only on advice from a nearby homeowner.
Save written approval, permit numbers, and any required inspection details. A common mistake involves building first and discovering that the pit sits too close to a fence. This Old House’s fire-pit guide also recommends checking local codes before construction begins. Verify the rules before you mark the patio area.
3) Measure and mark a 10-by-10-foot patio using stakes and mason line
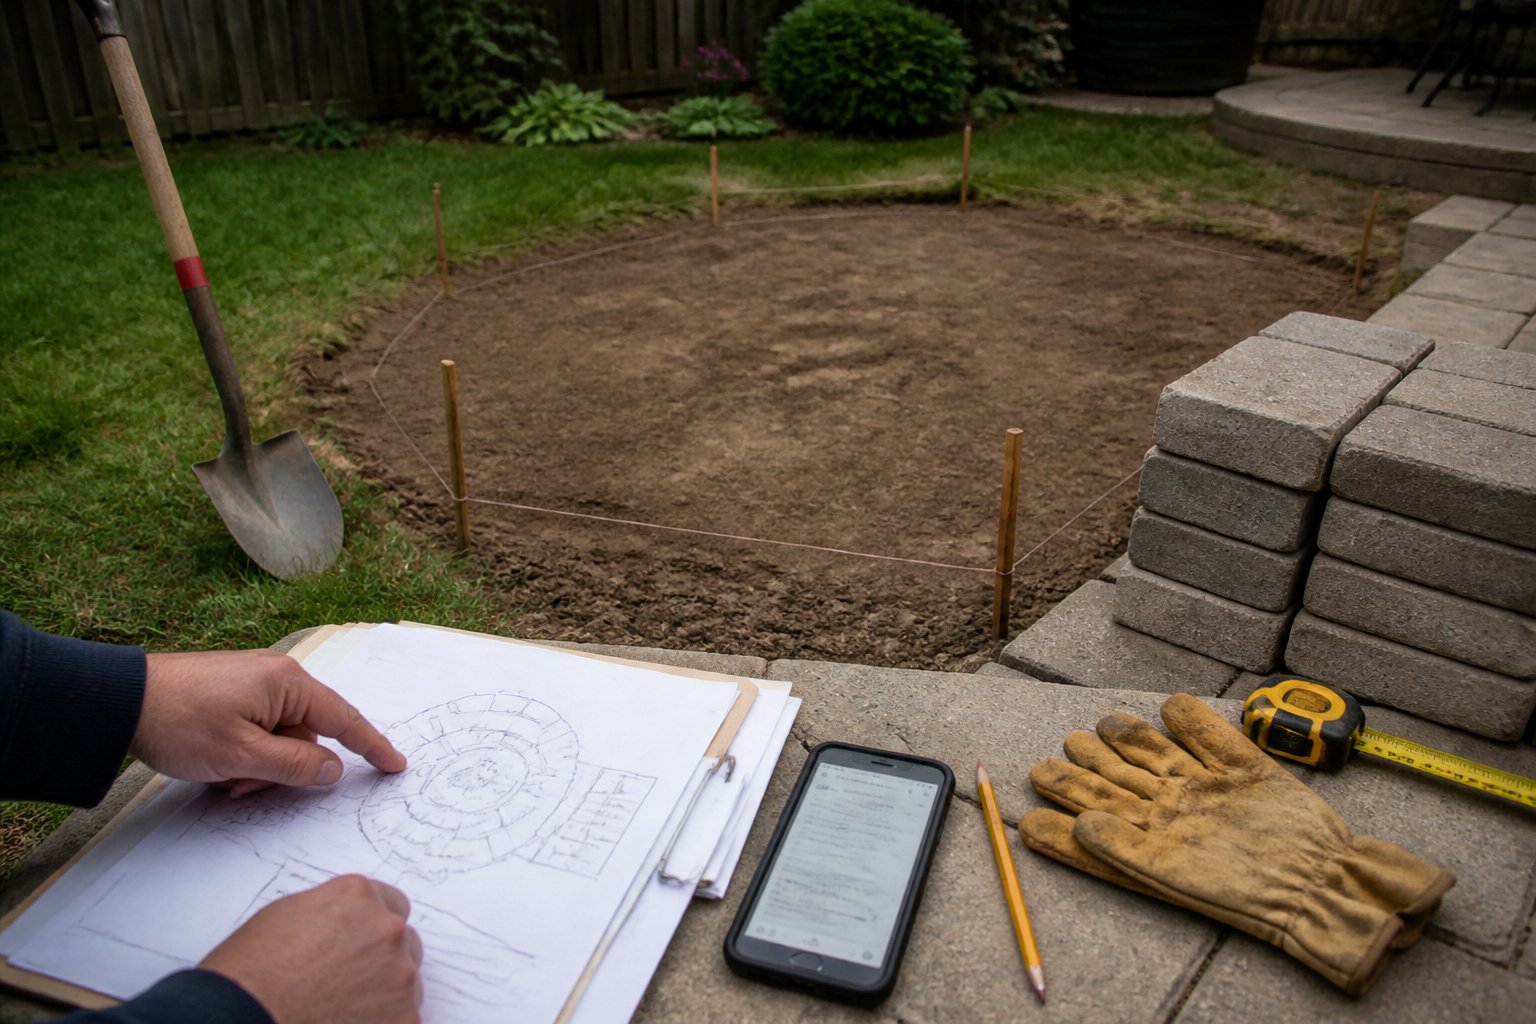
Start with a tape measure, four stakes, mason line, and a square. Choose a level location at least the required distance from buildings, fences, trees, and other flammable materials. Check local fire rules before marking the patio.
Drive one stake at each corner, spacing them 10 feet apart. Tie the line around the stakes to show the patio edges. For accurate corners, use the 3-4-5 measuring method: measure 3 feet along one line, 4 feet along the adjoining line, and adjust the corner until the diagonal measures 5 feet.
Keep each string tight and slightly above the ground. Measure both diagonals; they should match at about 14 feet 1 inch. If they differ, move the stakes before digging, then mark the inside edge with landscape spray paint. (https://www.hardscapementor.com/blog/paver-patio-step-1-how-to-layout-design-in-the-field)
4) Remove grass and excavate the site to a depth of about 7 inches
Mark the patio outline with stakes and string, then cut through the grass along the lines. Remove the sod in shallow sections so you can keep the ground level and avoid tearing up more soil than needed.
Excavate about 7 inches below the planned finished surface. This depth allows room for the compacted base, bedding sand, and patio pavers. If the site slopes, follow the slope only when your design allows it; otherwise, dig deeper on the high side to create a level patio.
Check the depth with a tape measure at several points. A common mistake is measuring from the grass instead of from the final patio height, which can leave one edge too high. Remove roots, loose soil, and soft spots, then tamp the exposed ground firmly before adding the base. Mark the finished height clearly before you continue.
5) Compact the Soil Thoroughly With a Hand Tamper or Plate Compactor
Compact the exposed soil before adding gravel so your fire pit patio has a stable base. Remove roots and loose organic material, then dampen dry soil lightly. Work in layers no deeper than 2 inches, using overlapping strikes with a hand tamper.
A hand tamper works for small patios and tight edges, but a plate compactor saves time and delivers more even pressure across larger areas. Make several passes in different directions, especially near the fire pit and patio borders. Avoid soaking the ground; wet soil can smear instead of compacting.
Watch for soft spots. If one still gives under your foot after tamping, remove the weak soil, replace it with crushed gravel, and compact that area again. This guide to compacting a patio base also recommends using a hand tamper mainly for small areas and confined spaces. Take your time here, because every uneven or loose section can lead to settling later.
6) Add and level 4 inches of compactable gravel for drainage and stability
Spread about 4 inches of compactable crushed gravel across the excavated patio area. This base supports the fire pit and helps rainwater drain instead of collecting beneath the surface. For a stable patio, use a compacted crushed-stone base rather than rounded pea gravel at this stage.
Add the gravel in two 2-inch layers. Lightly spray each layer with water, then compact it with a hand tamper or rented plate compactor. Walk the surface and check for soft spots; add more gravel where it flexes or sinks.
Keep the finished base slightly sloped, about 1/8 inch per foot, so water moves away from nearby structures. A long board and level can help you find high spots. Take time to compact this layer well, because loose gravel can cause the patio and fire pit to shift later.
7) Spread 1 inch of bedding sand over the compacted gravel base
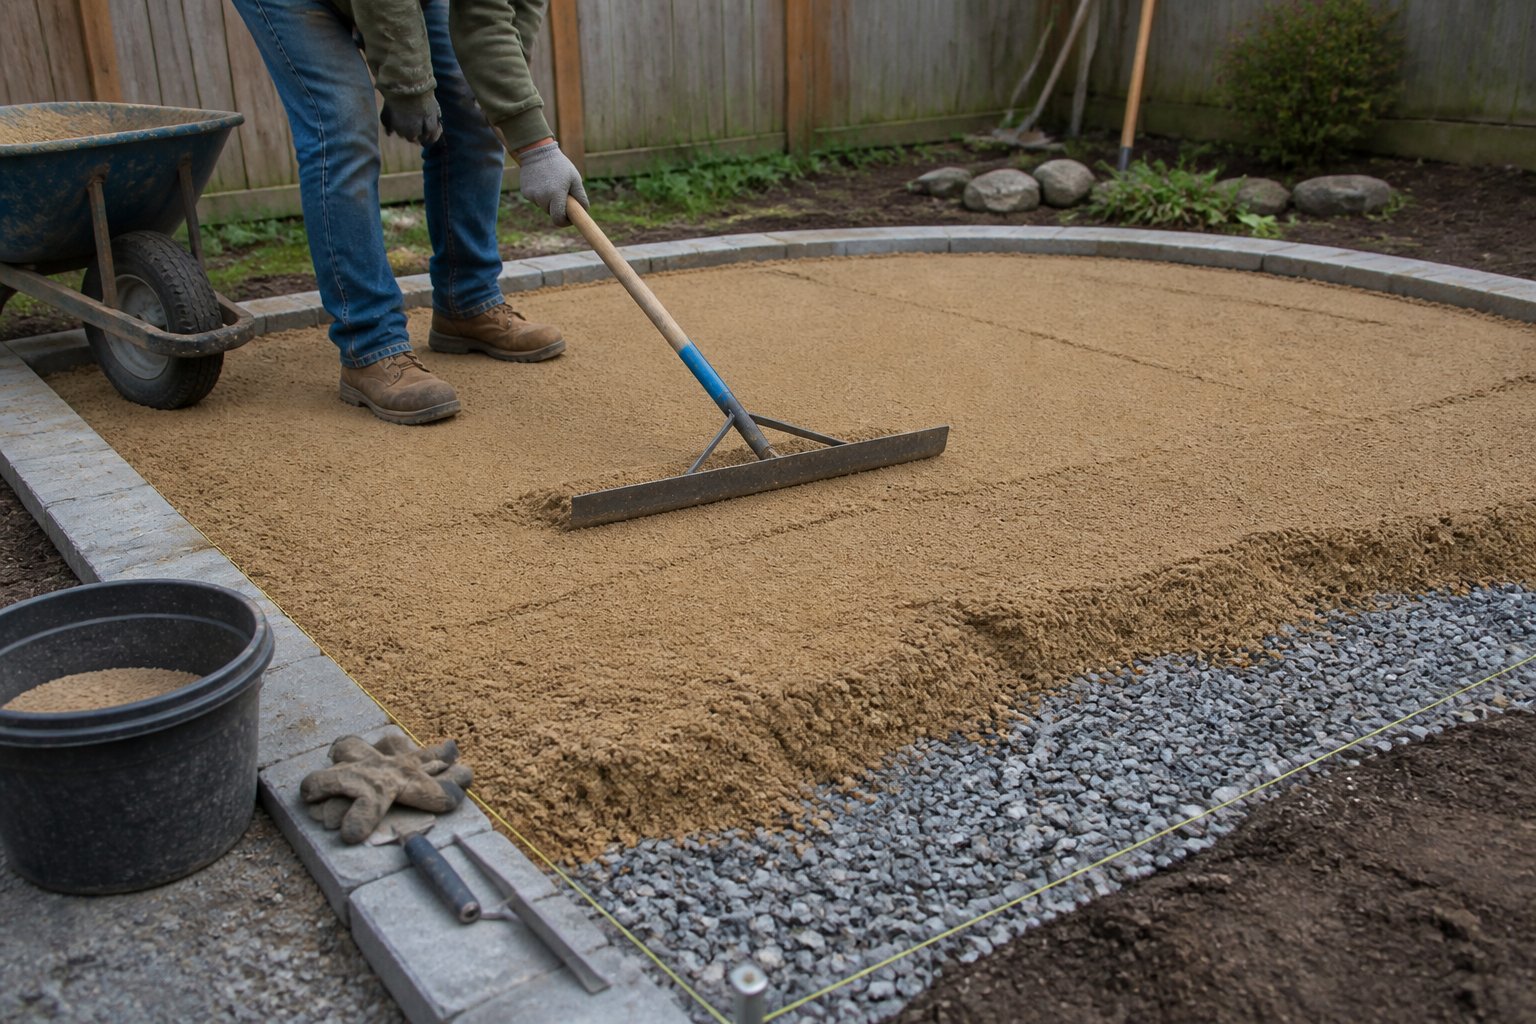
Spread a uniform 1-inch layer of coarse bedding sand across the compacted gravel base. Use a straight board, such as a 2×4, to screed the sand smooth. Rest the board on temporary pipes or guides set at the correct height, then pull it toward you without pressing down.
Work in small sections so you do not disturb the finished surface. Remove the guides and fill their grooves with sand, then smooth those areas carefully. Do not compact the sand before laying the pavers; the pavers will settle and lock it in place.
Check the layer with a ruler in several spots. A thicker or uneven bed can cause pavers to rock, sink, or crack later. This sand-based paver patio guide also recommends maintaining an even bedding layer for proper installation. Lay the pavers promptly while the sand remains clean and level.
8) Lay affordable concrete pavers from the outer edge toward the center
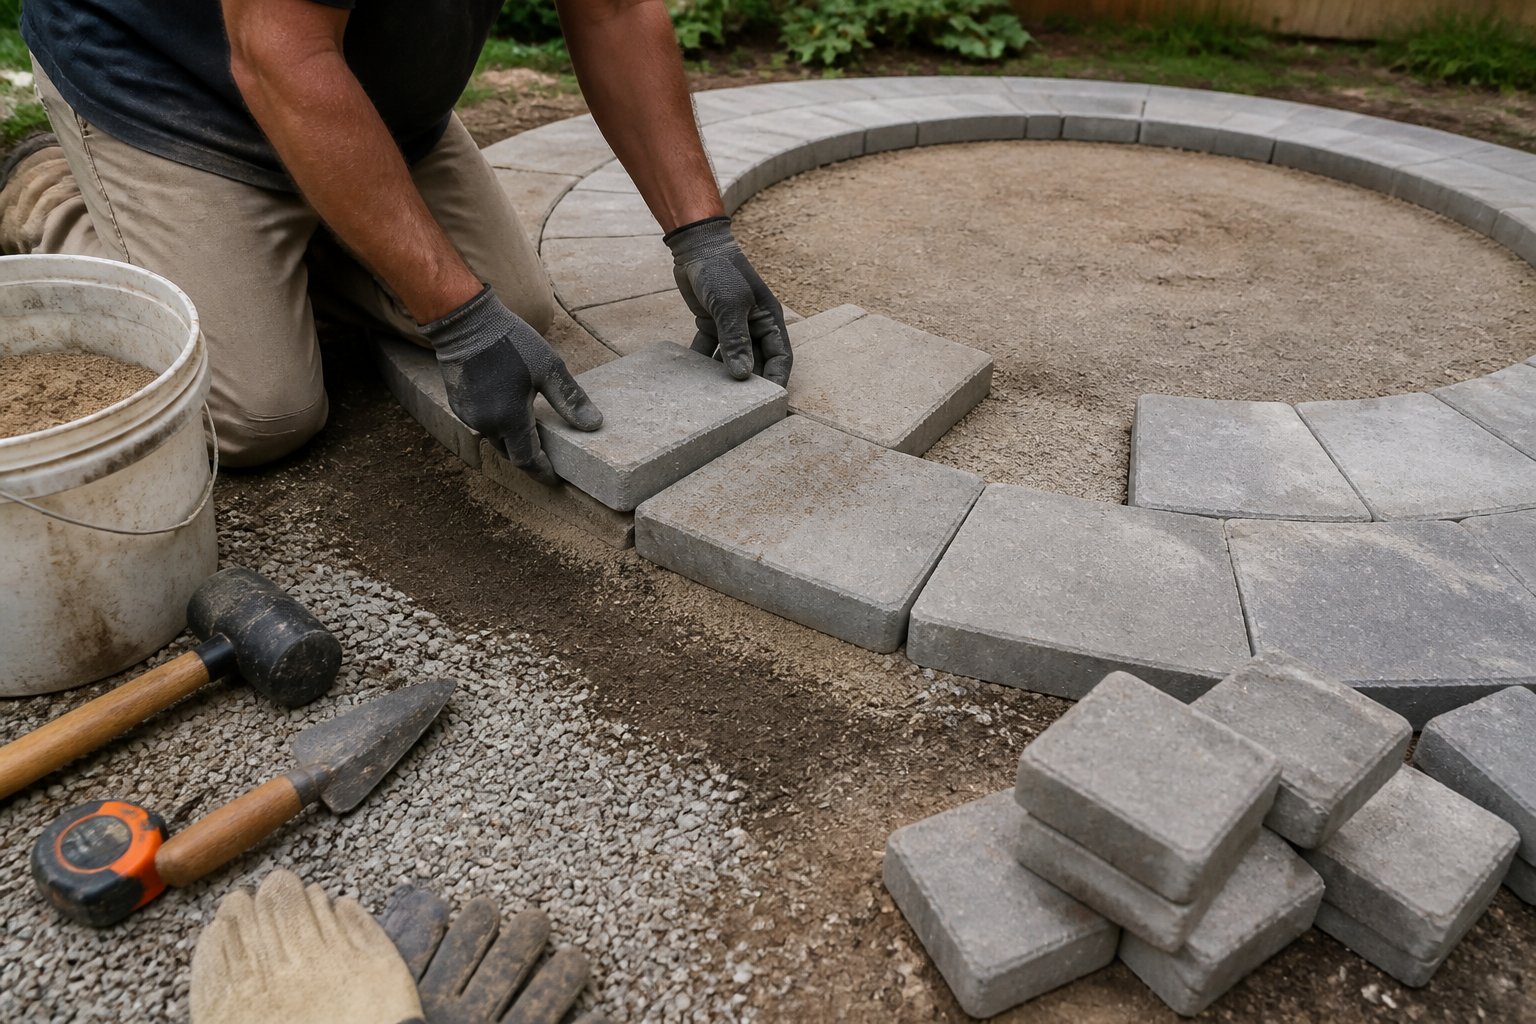
Start at the patio’s outside edge, where a firm border helps keep each concrete paver in place. Set the first pavers tightly against the edging, then work inward row by row. Use a rubber mallet to seat each piece without cracking it.
Check the surface with a level every few pavers. A slight slope away from the fire pit helps rain drain, but avoid dips that collect water. Keep joints even by using spacers or a narrow scrap of wood.
For a round patio, follow your layout string and adjust the gaps gradually. Do not force square pavers into a curve; small gaps at the outer edge are easier to fill with cuts. Sweep sand into the joints only after all pavers sit firmly. For detailed guidance on base preparation, bedding sand, and paver placement, review this step-by-step patio guide. Keep spare pieces nearby so you can replace chipped pavers without stopping work.
9) Cut edge pavers with a rented masonry saw for a clean fit
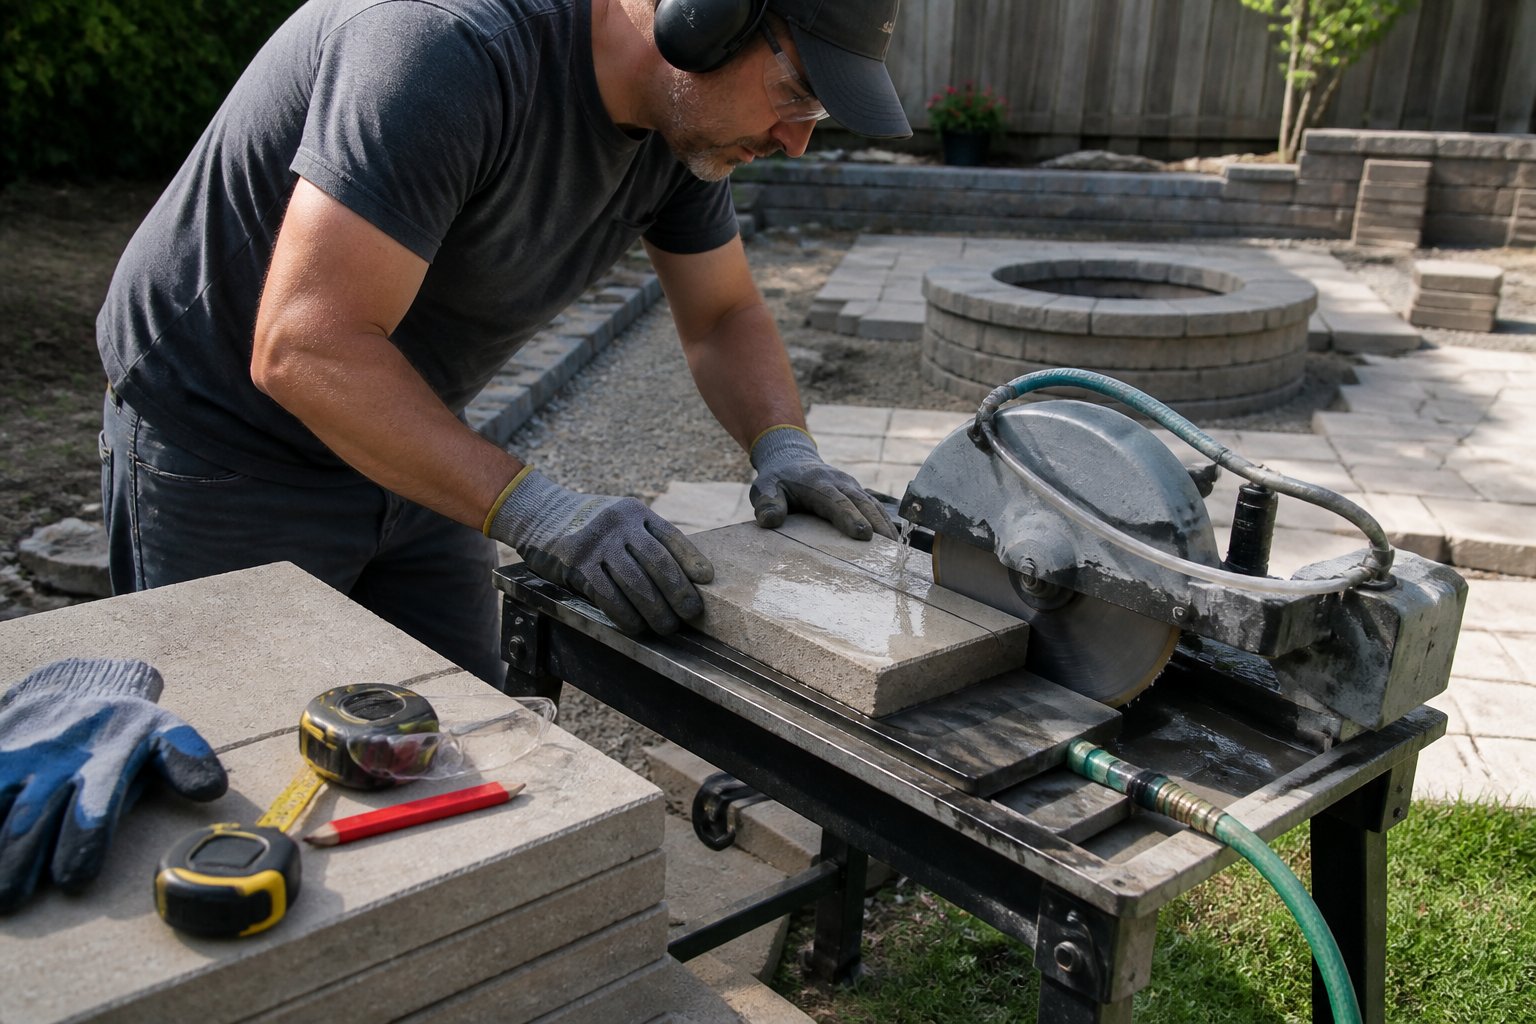
Use a rented masonry saw when full pavers do not fit along the patio edge. Mark each cut with a pencil or chalk, then measure twice before turning on the saw. A wet-cut saw helps control dust and keeps the blade cooler.
Wear safety glasses, hearing protection, non-slip footwear, and gloves. Keep your hands away from the blade, and follow the rental company’s instructions. Support the paver firmly on the saw table so it does not shift during the cut.
Cut slowly and let the blade do the work. Do not force a paver through the blade, since pressure can cause a rough edge or damage the piece. Check each cut in place before applying edge restraint.
If you need only one or two rough cuts, a masonry chisel may cost less, but it will leave a less precise edge. Rent the saw for several cuts, mark every piece first, and return it as soon as the job ends.
10) Install a Steel Fire Ring or Approved Fire Pit Insert in the Patio Center
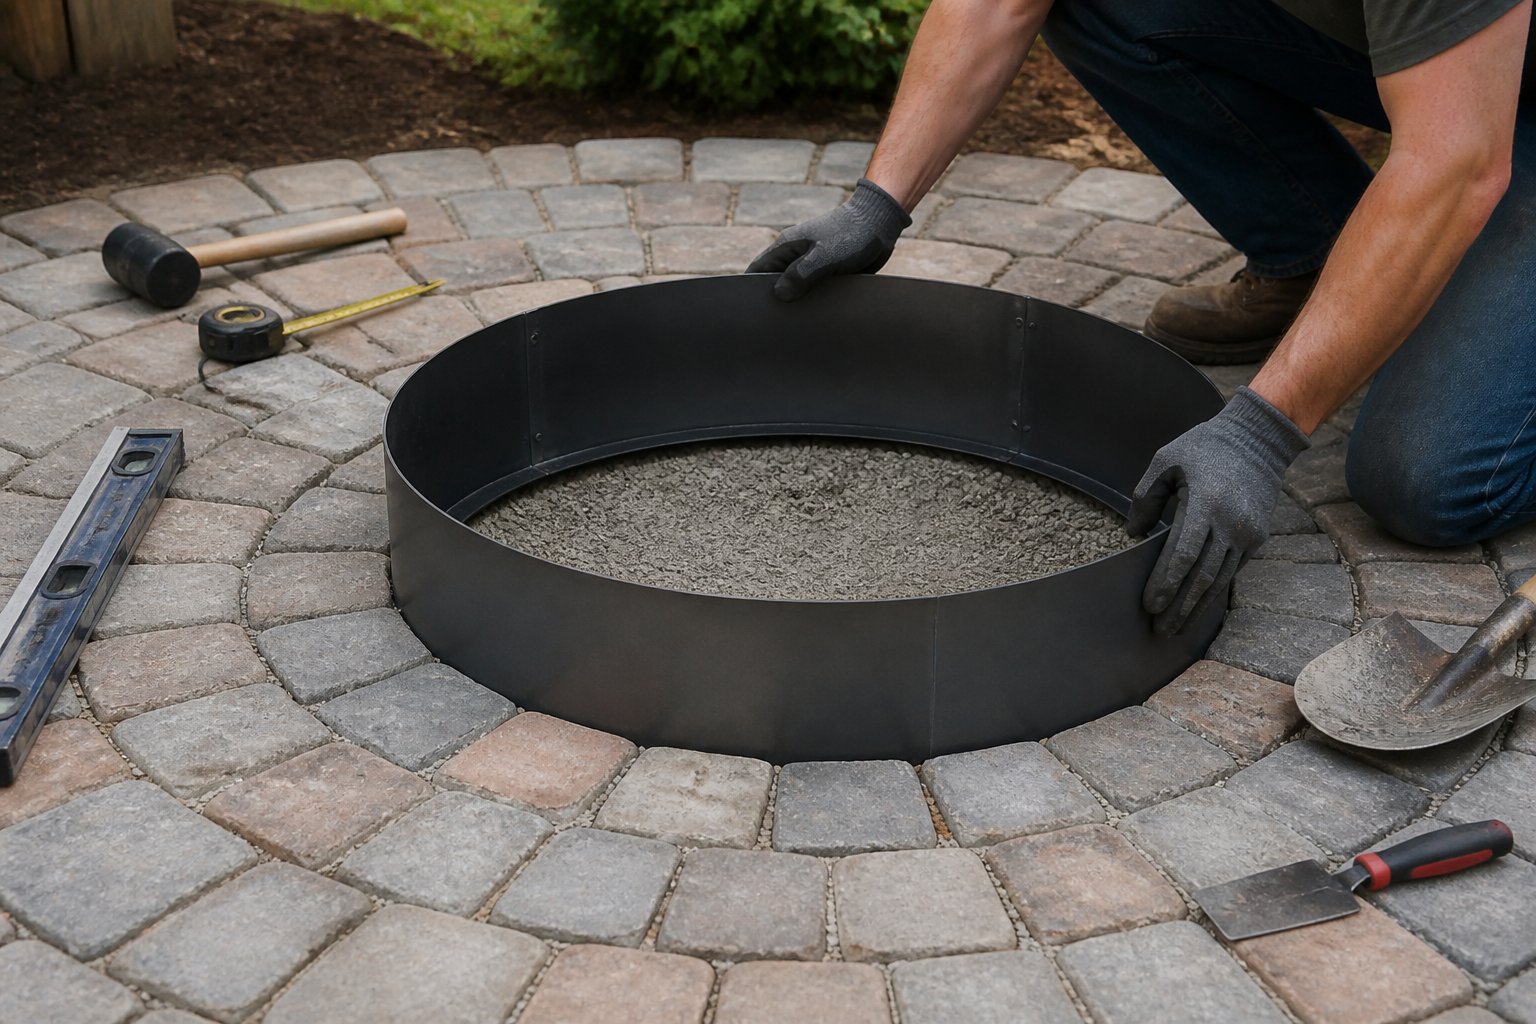
Center the steel fire ring on the finished patio before you add seating. Measure from opposite patio edges, mark the midpoint, and set the ring there. A centered ring spreads heat more evenly and leaves room for chairs.
Choose a ring or insert rated for outdoor wood fires. Place it on a level, noncombustible surface, and keep its base clear of loose pavers that could shift. If the ring sits directly on pavers, check the manufacturer’s instructions and local fire rules first. Installation guidance for fire pit rings recommends checking the fit and placement before securing the surrounding materials.
Do not use a thin decorative bowl or place the ring against a wall, fence, tree, or overhanging branch. Add a small layer of fire-rated lava rock only if the insert allows it, then test the ring for wobble before lighting your first fire.
Planning a Safe, Code-Compliant Patio
A safe fire pit patio starts with a clear space, stable paving, and rules you confirm before digging. Check overhead hazards, protect nearby structures, and plan for safe seating and access.
Choosing a Location Away From Structures
Choose a level area at least 10 feet from your home, shed, fence, trees, and other combustible materials, unless your local fire authority requires more space. Keep the pit away from low branches, roof overhangs, utility lines, and dry grass. Never place it beneath a covered patio or near stored firewood, fuel, or outdoor furniture.
Call your utility-locate service before excavation. Mark the patio first, then check that people can walk around the pit without crossing the fire area. Leave room for chairs, a clear exit path, and a hose or bucket of water within reach.
Avoid low spots where rain collects. A compacted gravel base and a slight slope away from structures help control drainage. Do not build directly over tree roots or septic components. For layout and site-preparation ideas, review this step-by-step fire pit patio plan.
Checking Local Fire Pit and Permit Rules
Rules vary by city, county, and fire district. Before buying materials, call your local building department or fire marshal and ask about setbacks, permit requirements, fire-ring materials, burn bans, smoke limits, and allowed fuel. Some areas allow propane pits but restrict or prohibit wood fires.
Ask whether the patio itself needs a permit, especially if you excavate deeply, install retaining walls, or build near a property line. Confirm whether your homeowners association has separate restrictions.
Keep written approval or permit details with your project notes. Local rules may require a spark screen, an approved insert, or a specific distance from structures. A code-compliant backyard fire pit guide can help you prepare questions before contacting officials. Get the rules confirmed before you dig.
Long-Term Care and Seasonal Protection
Protect your investment by keeping pavers stable, removing ash safely, and controlling water around the patio. Small checks after heavy rain and before winter can prevent stains, shifting, cracks, and costly repairs.
Maintaining Pavers and Fire Pit Materials
Sweep the patio regularly to remove ash, leaves, and grit. Ash can stain porous pavers, so let it cool completely, then place it in a metal container with a tight lid. Do not sweep ash into garden beds or wash it into drains.
Clean food grease and soot with warm water and a mild dish detergent. Test any cleaner on a hidden paver first. Avoid harsh acids, pressure-washing close to polymeric sand joints, and salt-based ice melt, which can damage surfaces and nearby plants.
Inspect the fire ring and blocks each spring. Replace cracked blocks, loose caps, or badly rusted steel parts before lighting another fire. Keep the fire ring centered; shifting can expose pavers to direct heat. If you used polymeric sand, add matching sand to joints that have washed out, then follow the product’s instructions for wetting and curing.
Managing Drainage and Winter Weather
Water should drain away from the fire pit instead of collecting beneath the pavers. After a heavy storm, check for puddles, soft edges, or sunken sections. Lift and reset affected pavers with fresh bedding sand, and correct low spots before freezing weather makes the damage worse.
Keep gutters and downspouts from discharging onto the patio. Extend downspouts several feet away, but do not direct water toward a neighbor’s property. Clear leaves from the patio and nearby drainage paths before winter.
In freezing climates, avoid rock salt and metal shovels. Use a plastic shovel and a manufacturer-approved deicer sparingly, or remove snow with a broom. Cover movable furniture, but leave the fire pit open unless its cover allows ventilation and fully dries after rain.