The Concrete Patio Trick That Saves $3,000 Homeowners Swear By
A concrete patio can become one of the most expensive parts of your backyard project, especially when labor, site preparation, and decorative finishes add up. You may not need to cut quality to control the budget—you may only need to make smarter choices before the work begins.
You can reduce your patio bill by simplifying the design, preparing the site carefully, and choosing practical finishes. This guide explains how layout, timing, materials, joint placement, and surface treatments affect the final price, so you can plan a durable patio without paying for features that add little value.
1) Pour a simple rectangular slab to reduce forms, cuts, and labor
A rectangular patio usually costs less because you build fewer forms and make fewer cuts. Before digging, sketch the slab beside the house and adjust its size so the edges stay straight. A simple 12-by-16-foot layout is easier to measure, level, and finish than one with several corners.
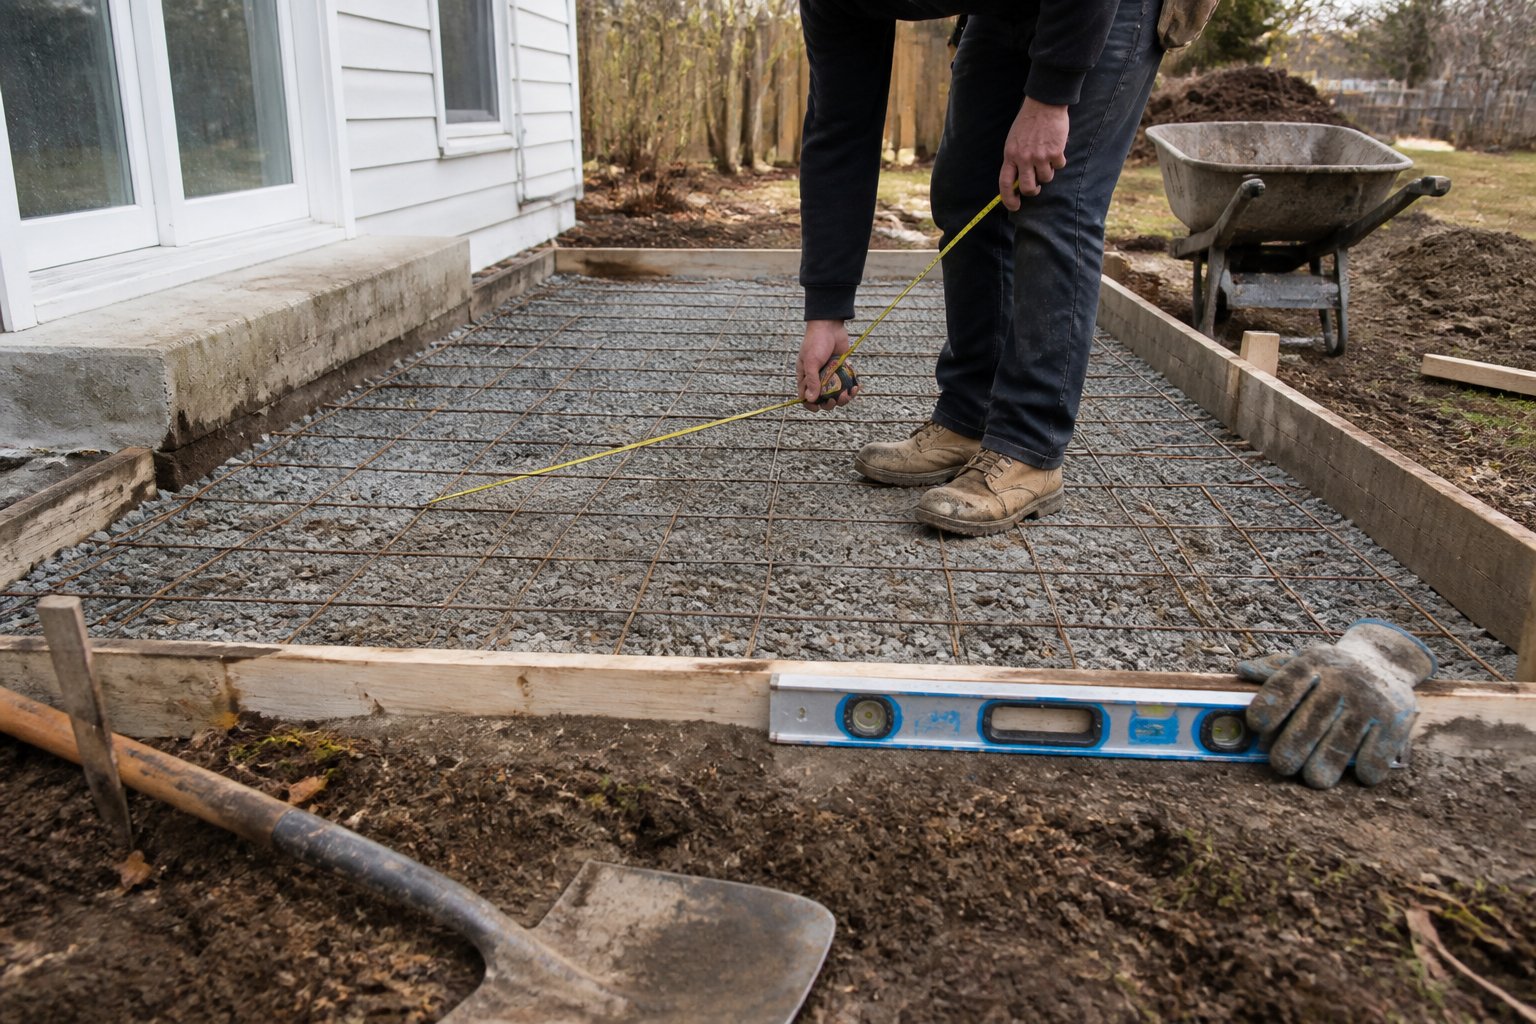
Keep the slab away from buried utility lines, and check local permit and drainage rules before work begins. Remove sod and soft soil, then compact the subgrade and add the required gravel base. Poor compaction can cause settlement and cracks later.
Build sturdy forms from straight boards, stake them securely, and check the diagonal measurements to confirm a square layout. Plan the concrete delivery or mixing schedule carefully; a partial pour can create a weak joint. For detailed steps on forming, pouring, finishing, and curing, review this step-by-step concrete slab guide. A clean rectangle makes every later task faster and easier.
2) Build during the off-season when contractors may offer lower rates
Plan your concrete patio during the contractor’s slower months, often late fall through winter, to improve your chances of getting a lower labor rate. Some estimates suggest off-season work may reduce labor costs by 15–25%, but local weather, demand, and project access will affect the final price. Seasonal concrete pricing guidance can help you plan realistic savings.
Call contractors early, before the busy spring rush. Ask whether they offer winter pricing, then compare written estimates that list labor, concrete, reinforcement, finishing, permits, and weather-related fees. A low bid may exclude important preparation work.
Do not schedule a pour during freezing conditions without a clear cold-weather plan. Your contractor may need concrete additives, protective blankets, or extra curing time, which can reduce or erase the savings. Flexible timing gives you more leverage, but protect the quality of the slab first.
3) Handle site clearing, excavation, and base preparation yourself
You can reduce patio costs by doing the early physical work yourself, if local rules and site conditions allow it. Remove grass, roots, mulch, and loose soil, then mark the finished patio height before you dig.
Excavate deep enough for the planned concrete and compacted gravel base. The exact depth depends on soil, drainage, frost, and local requirements. Keep the area slightly sloped away from your home, and call before digging to avoid buried utilities.
Use clean, well-graded gravel and compact it in thin layers with a rented plate compactor. Do not pour over soft spots, organic soil, or loose fill. A contractor once had to remove a new slab because the homeowner skipped compaction and the ground settled beneath one corner.
Check the forms, grade, slope, and base firmness before scheduling the pour. That preparation can reduce labor while giving the crew a stable surface to build on.
4) Use a gravel sub-base to reduce concrete depth where conditions allow
A compacted gravel sub-base can reduce the amount of concrete you need when the soil drains well and the patio carries normal foot traffic. Start by removing organic soil, then compact the exposed ground before adding about 4 to 6 inches of crushed stone in thin lifts. This concrete slab base guide explains why proper compaction matters.
Use angular, well-graded crushed stone rather than rounded river gravel. Compact each layer with a plate compactor, and keep the surface sloped slightly away from the house for drainage. Do not use this shortcut on soft clay, fill soil, or areas with standing water without improving the site first; problem soils may need special preparation.
Check local requirements and your patio’s intended load before reducing slab thickness. A careful base saves material, but poor compaction can lead to settlement and cracks.
5) Choose standard concrete instead of premium colored or specialty mixes
For a budget-friendly concrete patio, choose a standard mix unless you need a specific performance feature. Plain concrete typically costs less than colored or stamped finishes, which can raise material and labor costs. A concrete patio cost guide lists broad pricing ranges because site work, thickness, access, and finishing affect the final bill.
Ask your contractor whether the standard mix meets your local conditions and planned use. You may need a stronger mix for heavy loads or a special mix for freeze-thaw weather, but avoid paying for upgrades without a clear reason.
A common mistake involves ordering premium color throughout the slab, then covering much of it with furniture or an outdoor rug. If you want more personality, save money with a simple border, stain, or carefully placed furniture instead of upgrading every cubic yard. Choose the basic mix first, then spend on features you will actually see and use.
6) Add control joints during installation to limit future cracking costs
Treat control joints as part of the patio layout, not as an afterthought. Concrete naturally shrinks as it cures, so planned joints give cracking a straighter, less noticeable path. For many slabs, contractors space joints about 24 to 36 times the slab thickness. A 4-inch slab may therefore use joints roughly 8 to 12 feet apart, subject to local requirements and site conditions. See this guide to control-joint spacing and depth.
Cut or tool each joint to at least one-quarter of the slab depth. Make the panels close to square, and avoid long, narrow shapes around corners or openings. Saw-cut too late, and the slab may crack before the joint works; cut too early, and the edges may break. Ask your installer to confirm the layout, timing, and depth before pouring, because correcting random cracks later can cost far more than planning joints during installation.
7) Apply a concrete stain instead of installing costly pavers or tiles
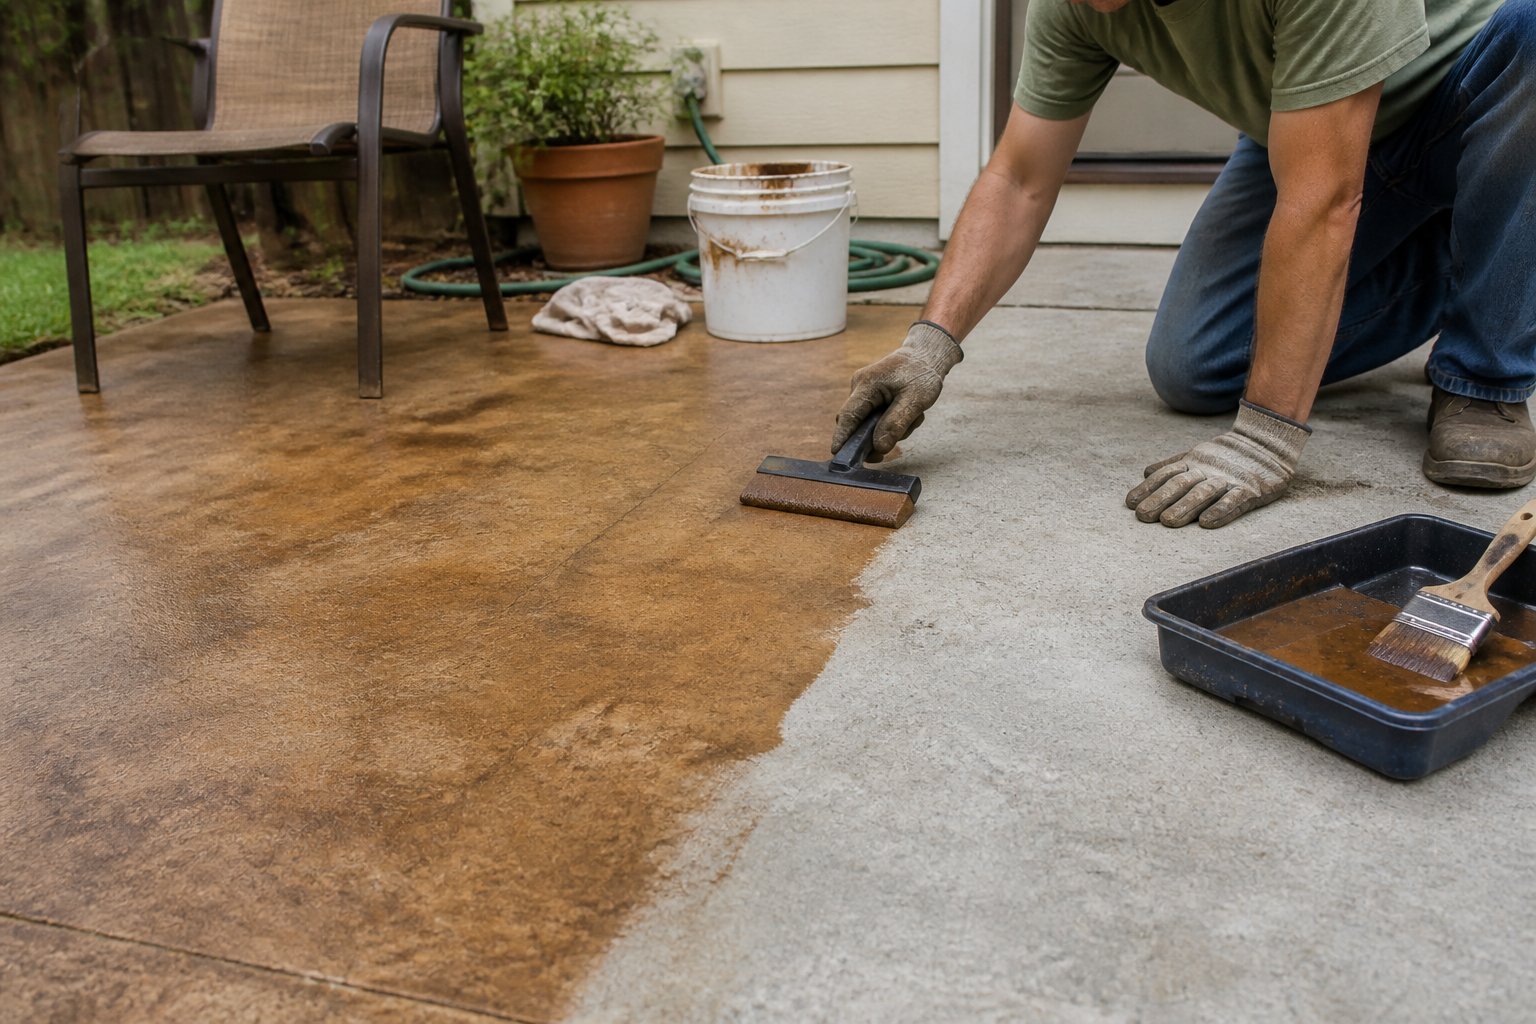
A concrete stain can refresh your patio without the labor and material costs of removing the slab and installing pavers or tiles. You can choose water-based stain for more even color or acid stain for natural, varied tones that resemble stone.
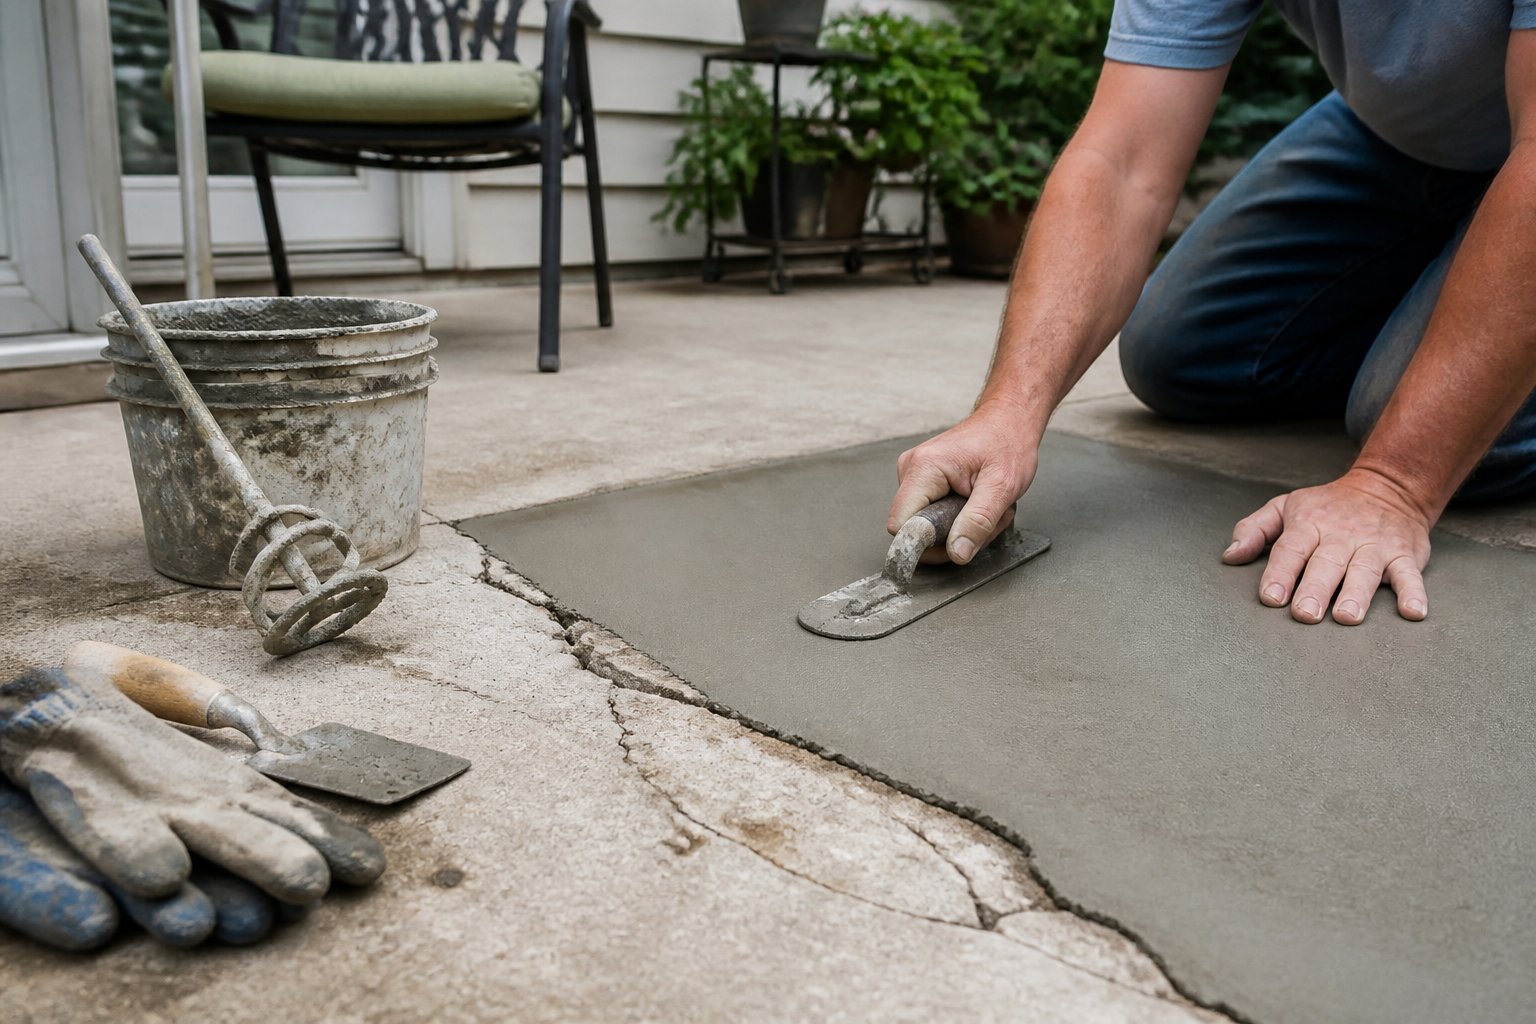
Start by repairing cracks, removing grease, and cleaning the surface thoroughly. Test the stain in a hidden spot first. Existing paint, sealers, patches, and uneven concrete can affect the final color, so do not skip this step.
Apply the stain with a sprayer, roller, or brush, following the product directions. Work in small sections and keep a wet edge to reduce lap marks. After the stain dries, add a compatible concrete sealer to protect the color from weather and foot traffic. This step-by-step patio staining guide covers surface preparation and application details. A clean surface and careful test patch will give you the best chance of getting a finish you’ll enjoy for years.
8) Use stencils and concrete paint to create a faux-tile pattern
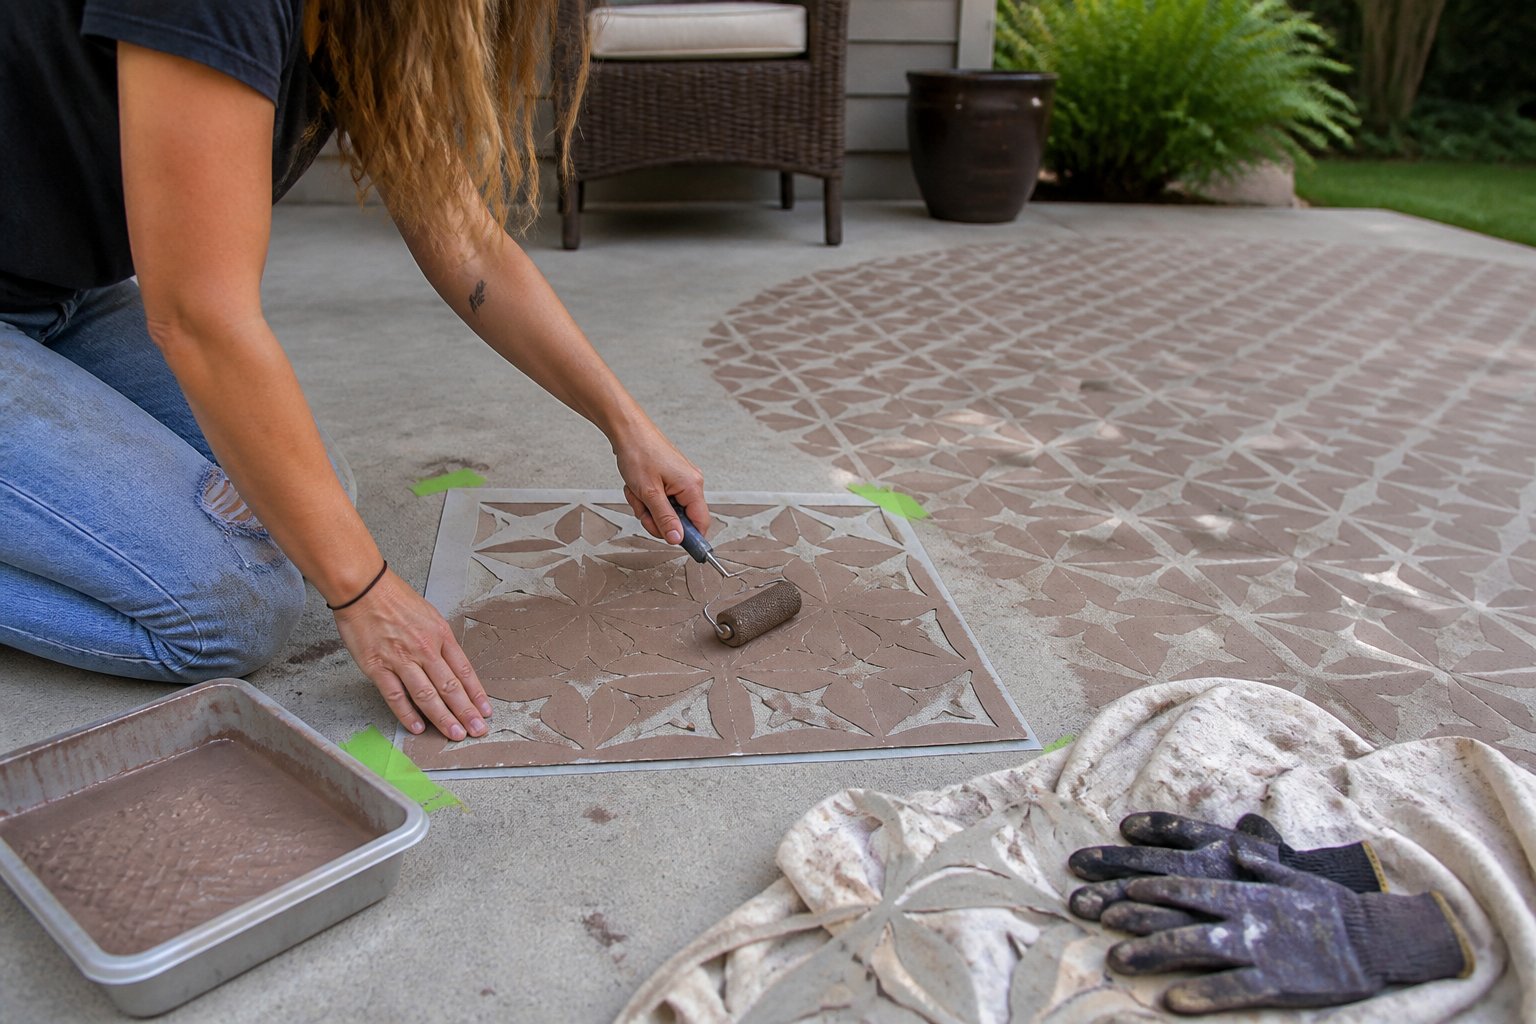
You can create a faux-tile patio with exterior concrete paint, a reusable stencil, and careful preparation. This budget-friendly method works best on clean, sound concrete with no active cracks, peeling coating, or standing moisture. Repair flaws first, then let the surface dry fully.
Apply a compatible base coat with a roller and allow it to cure according to the label. Secure the stencil with painter’s tape, use a stencil brush or lightly loaded roller, and dab rather than flood the openings. A thin coat prevents paint from bleeding under the pattern.
Begin in a less visible corner to test spacing and coverage. Clean the stencil often, especially on textured concrete, and let each section dry before repositioning it. For practical preparation and tool guidance, review this concrete patio stenciling tutorial.
Seal the finished pattern with an exterior concrete sealer to protect it from weather and foot traffic.
9) Resurface a sound old slab with a cement-based overlay
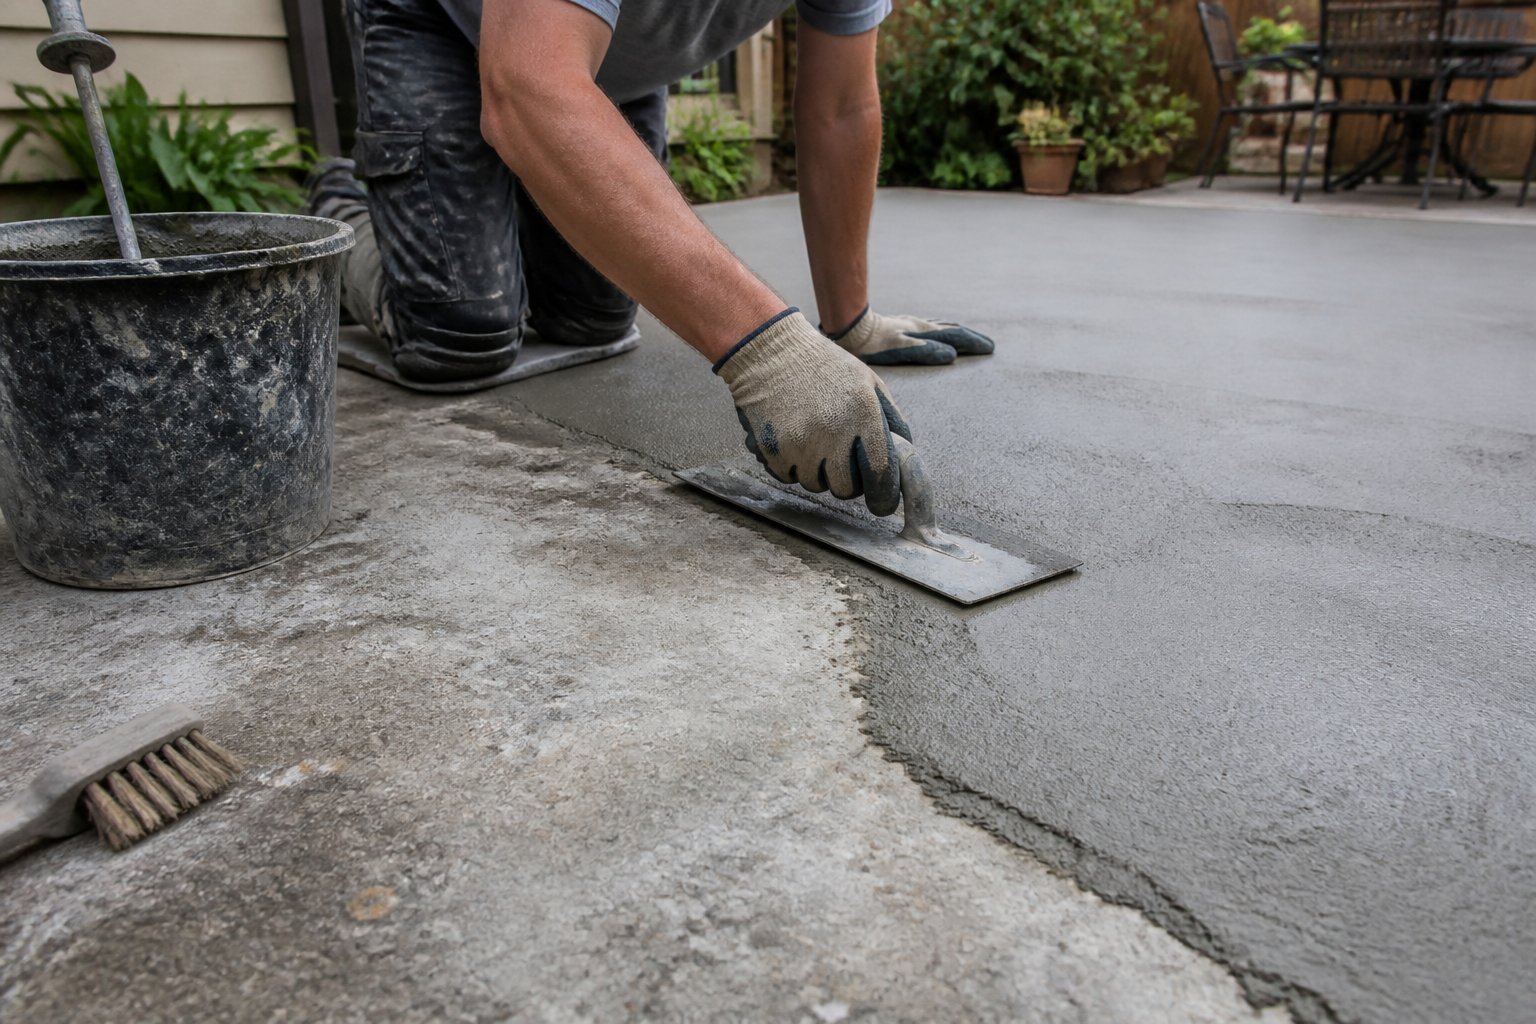
If your patio’s base remains solid, a cement-based overlay can refresh its surface without demolition. This approach suits stains, light scaling, rough texture, and minor cosmetic wear—not major settlement, deep structural cracks, or movement. Check the slab carefully before you price the project.
Start by repairing suitable cracks, removing loose concrete, and pressure-washing away grease, dirt, and coatings. The overlay needs a clean, sound surface to bond properly. Skipping preparation is a common mistake that can lead to peeling or early failure.
Choose a polymer-modified overlay for better adhesion and wear resistance. You can apply a smooth finish or use stamping mats to create the look of brick, stone, or wood, as described in this guide to stamped concrete overlays.
Follow the product’s mixing, weather, and curing instructions closely. If the slab has major cracks or settlement, compare resurfacing with full replacement costs before buying materials.
10) Choose broom-finished concrete for affordable slip resistance
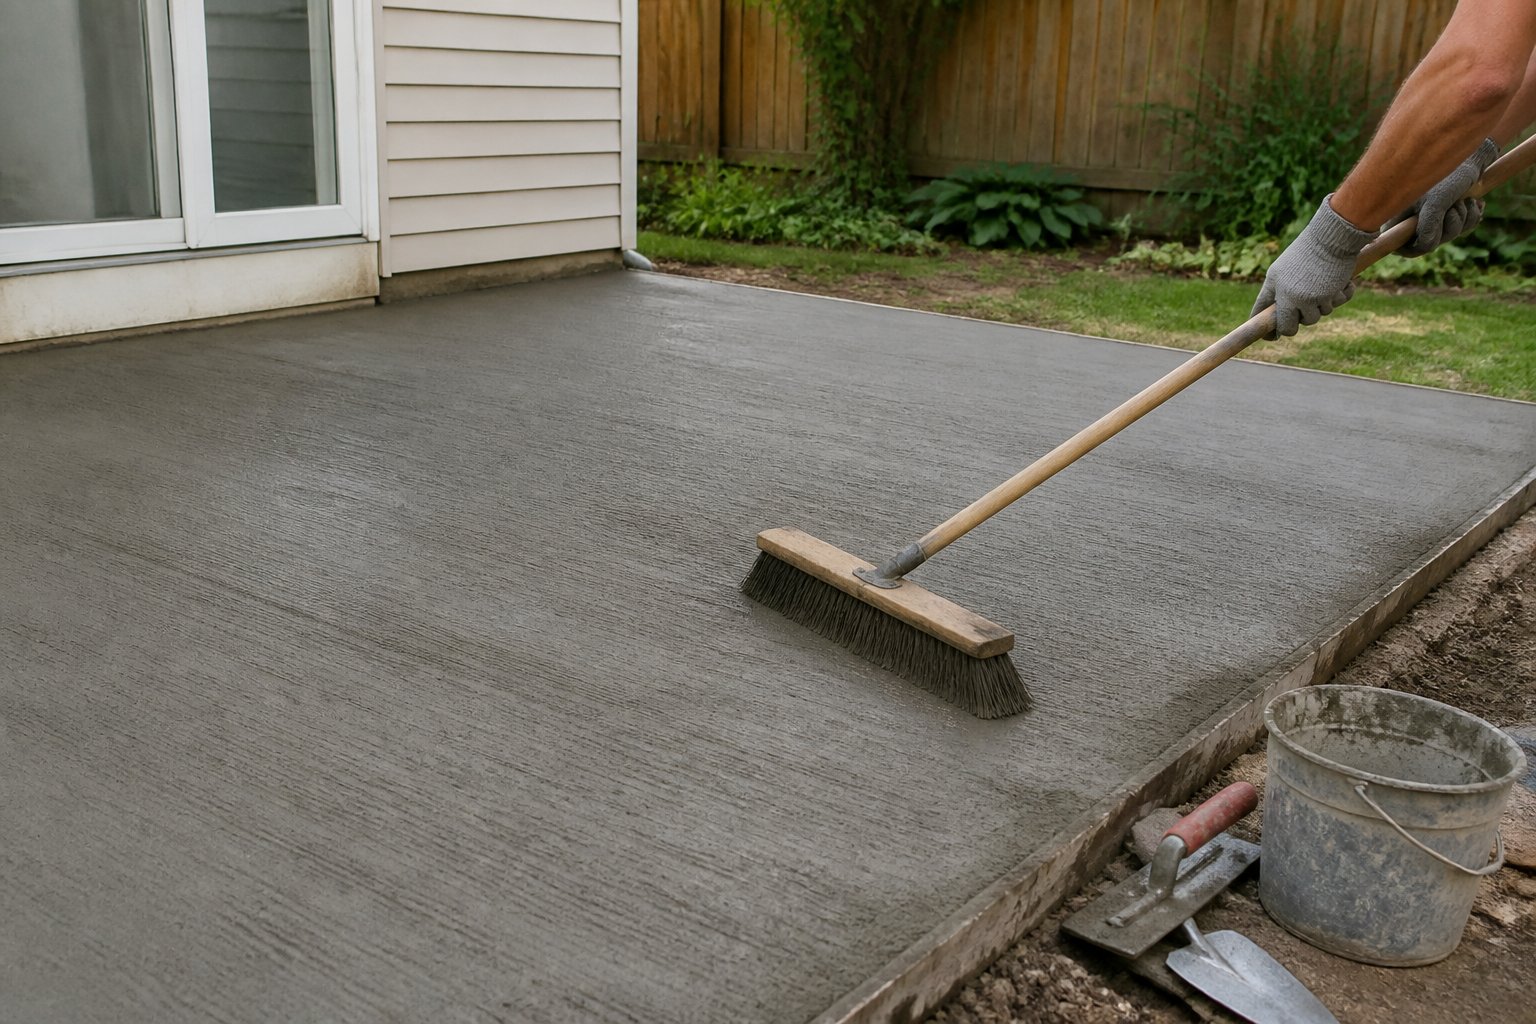
A broom finish gives your patio texture without the added cost of stamped patterns or exposed aggregate. Contractors pull a stiff broom across the concrete after the bleed water disappears and the surface firms up, creating shallow grooves that improve traction when the patio is wet.
Ask for a sample panel before work begins. The broom direction, timing, and pressure affect the final look and feel. A finish applied too early can create rough ridges, while brooming too late may leave weak or uneven texture.
This option works well around grills, outdoor showers, steps, and pool areas. It also hides small surface marks better than a smooth troweled finish and needs only routine sweeping and occasional washing. For a typical patio, broom finishing costs about $6–$10 per square foot, though local labor and site conditions can change the price.
Choose a light texture that gives you traction without making chairs difficult to move.
How Patio Design Choices Affect Total Cost
You can save thousands by keeping the layout simple, planning water flow before pouring, and choosing finishes that fit your budget. Shape, access, slope, and surface details affect both material needs and labor time.
Why Simple Shapes Reduce Forming And Labor Costs
A rectangle or square usually costs less because workers can measure, frame, and pour it faster. Curved edges, narrow sections, steps, and several corners require more form boards, cutting, leveling, and hand finishing. Complex designs also increase material use, a point noted in this concrete patio cost guide.
Before work begins, mark the patio with stakes and string. Compare a 12-by-20-foot rectangle with the same area split into several connected shapes. The second layout may need extra joints, framing, and cleanup even though both cover 240 square feet.
Keep the main slab simple, then add interest with furniture, planters, borders, or a small contrasting strip. If you want stamped concrete, choose one pattern and limit decorative bands. Stamped designs involve several decisions, including the layout and pattern, as explained in this stamped concrete patio design guide.
Drainage Planning That Prevents Expensive Repairs
Plan drainage before excavation, not after the concrete truck arrives. Your patio should slope away from the house and direct water toward a safe discharge area. A common planning target is about 1/8 to 1/4 inch of fall per foot, but your contractor should confirm the grade, soil, and local requirements.
Check door thresholds, window wells, nearby fences, and property lines. A patio that sits too high can send water toward your foundation or trap it against siding. If the yard collects water, include a channel drain, catch basin, or swale in the design instead of cutting into the finished slab later.
Use compacted base material and control joints at planned locations. Poor drainage, weak preparation, and random cracking can turn a low-cost pour into a repair project. Add 5% to 10% extra concrete when ordering to allow for waste and spills, as recommended in this patio planning guide.
Budgeting for a Durable Concrete Patio
A durable patio budget must cover more than the concrete truck. You need to price drainage, soil conditions, slab thickness, reinforcement, finishing, permits, and access before comparing contractor bids.
Comparing Site Preparation and Material Expenses
Site preparation often separates a realistic estimate from a cheap quote. Measure the patio area, check the planned slope, and identify whether workers must remove grass, roots, an old slab, or unstable soil. Poor soil may require extra excavation and compacted gravel. If water collects near the house, include drainage work before the pour.
Concrete patio installation commonly falls between $6 and $20 per square foot, depending on thickness, access, reinforcement, and finish. A plain broom finish costs less than stamped, stained, or colored concrete. Ask each contractor to list these items separately:
- Demolition and soil removal
- Gravel base and compaction
- Forms, reinforcement, and control joints
- Concrete delivery and finishing
- Sealing, cleanup, and permits
Do not compare only the total price. A low bid may omit excavation, reinforcement, or final sealing.
When Professional Installation Is Worth the Investment
Professional installation makes sense when the patio has difficult access, poor drainage, steep grade changes, or a large footprint. Concrete work also requires careful timing. Once the truck arrives, your crew must place, level, edge, joint, and finish the slab before it sets.
You can reduce labor costs by handling simple preparation tasks, such as removing patio furniture, trimming nearby plants, or clearing loose debris. Confirm these plans with the contractor first. Do not excavate without knowing the required depth, slope, and base design.
For a basic 200- to 400-square-foot patio, published estimates often range from $2,400 to $8,000. Pay for professional help when mistakes could cause cracking, standing water, or damage near your foundation. Request a written scope, proof of insurance, warranty terms, and a payment schedule before work begins.