10 Cheap Fence Ideas That Give You Total Privacy for Under $500: Stunning Budget Upgrades
A private yard does not have to come with a four-figure price tag. If neighbors, traffic, or nearby homes leave you feeling exposed, you can create a more comfortable outdoor space without draining your budget.
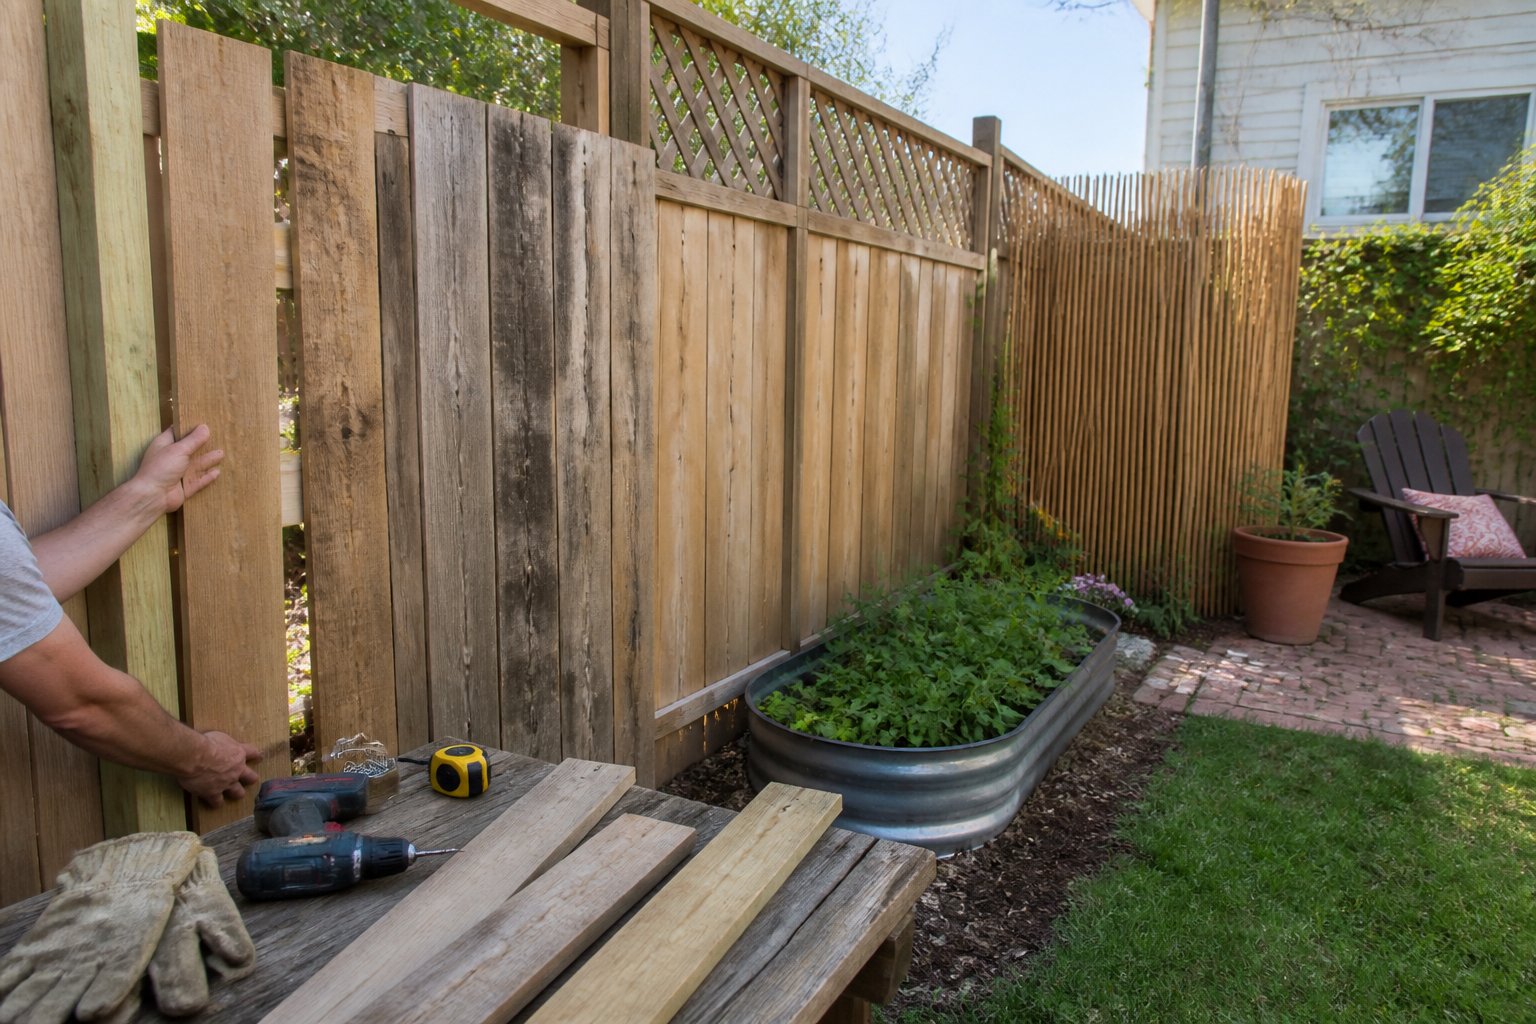
You can build an effective privacy barrier for under $500 by choosing affordable materials, planning the layout carefully, and doing some of the work yourself. You’ll explore practical fence ideas using wood, bamboo, metal, lattice, reclaimed materials, and living plants, along with guidance for budgeting, safe installation, and upkeep.
1) DIY Pallet Privacy Fence
A pallet fence gives you a low-cost way to block views around a yard, patio, or garden. Look for clean, heat-treated pallets marked “HT,” and avoid wood with oil stains, chemical odors, or unknown treatment. You can find more pallet fence design ideas for different layouts and styles.
Set sturdy posts in the ground, then attach the pallets with exterior-rated screws. Keep each pallet level, and leave a small gap below the wood to reduce moisture damage. For a taller barrier, stack pallets only after securing the lower row and checking local fence-height rules.
Sand rough boards, seal the wood, and add climbing plants or planter boxes for more coverage. A common mistake involves using weak pallets without reinforcing them, so inspect every board before installation. Plan your layout, gather safe materials, and build one stable section at a time.
2) Reclaimed wood board fence
Reclaimed wood can create a private fence for less than new lumber, especially when you find boards from old barns, pallets, or renovation projects. Choose boards with similar thicknesses, then remove nails and cut away rotten sections before installation.
Use sturdy posts set in concrete, and attach horizontal rails between them. Mount the boards vertically with small, even gaps, or overlap them slightly for better privacy. A mixed-board pattern can look intentional when you keep the top edge level.
Check each board for mold, chemical stains, and insect damage. Avoid painted wood with unknown coatings, and do not use pallet boards unless you can confirm they were heat-treated rather than chemically treated. Seal the finished fence with an exterior wood preservative to slow moisture damage.
For a cleaner look, trim the boards after mounting and add a simple top rail. This reclaimed wood fence guide shows how salvaged boards can work in a practical garden fence. Gather safe materials first, then build one section at a time.
3) Bamboo roll-screen fence
A bamboo roll-screen fence gives you fast backyard privacy without building a full panel fence. For a typical installation, set pressure-treated 4×4 posts about 6 to 8 feet apart, then attach the bamboo roll with galvanized wire or outdoor-rated zip ties. Bamboo rolls for fences come in several heights and lengths, so measure your space before buying.
Keep the bamboo slightly above the soil to reduce moisture damage. Stretch the roll evenly, but do not pull it so tightly that the slats split. A common mistake involves attaching bamboo directly to weak posts or an old chain-link fence without checking its stability first.
Use this option for a patio, side yard, or boundary that needs screening rather than heavy security. Add a top support rail in windy areas, and seal the bamboo according to the manufacturer’s directions. Plan your posts and fasteners carefully, then you can create a neat privacy screen in a weekend.
4) Corrugated Metal Panel Fence
For a sleek privacy fence on a tight budget, use corrugated metal panels inside a simple wood frame. Panels can run vertically for a taller look or horizontally for a wider visual line. Corrugated metal panels work well for modern, farmhouse, and industrial-style yards.
Set pressure-treated posts in the ground, then attach horizontal rails between them. Fasten each panel with exterior-rated screws and washers to prevent leaks and reduce movement. Add a top and bottom wood rail to cover sharp edges and give the fence a finished appearance.
Before you buy materials, measure the panel width and plan your post spacing around it. A common mistake involves cutting panels without allowing room for overlap or expansion. Check local fence rules, property lines, and underground utility locations first. For added privacy, seal gaps at corners and use dark paint on the frame.
5) Lattice-Panel Privacy Fence
A lattice-panel fence gives you affordable privacy while keeping your yard bright and open. Use 6-foot wood or vinyl lattice panels with pressure-treated posts, then attach a privacy fabric or climbing plants behind the openings if you need more coverage.
Set the posts securely in gravel or concrete, and check local height rules before you begin. Attach each panel with exterior screws and leave a small gap above the ground to reduce moisture damage. A common mistake is mounting lattice directly against soil, which can cause early rot.
For a polished look, add a simple top and bottom frame, then seal wood panels with exterior stain. You can also install lattice as a budget-friendly privacy screen along an existing chain-link fence, reducing materials and labor. Measure your fence line carefully before buying panels, and let the layout guide your final design.
6) Chain-link fence with privacy slats
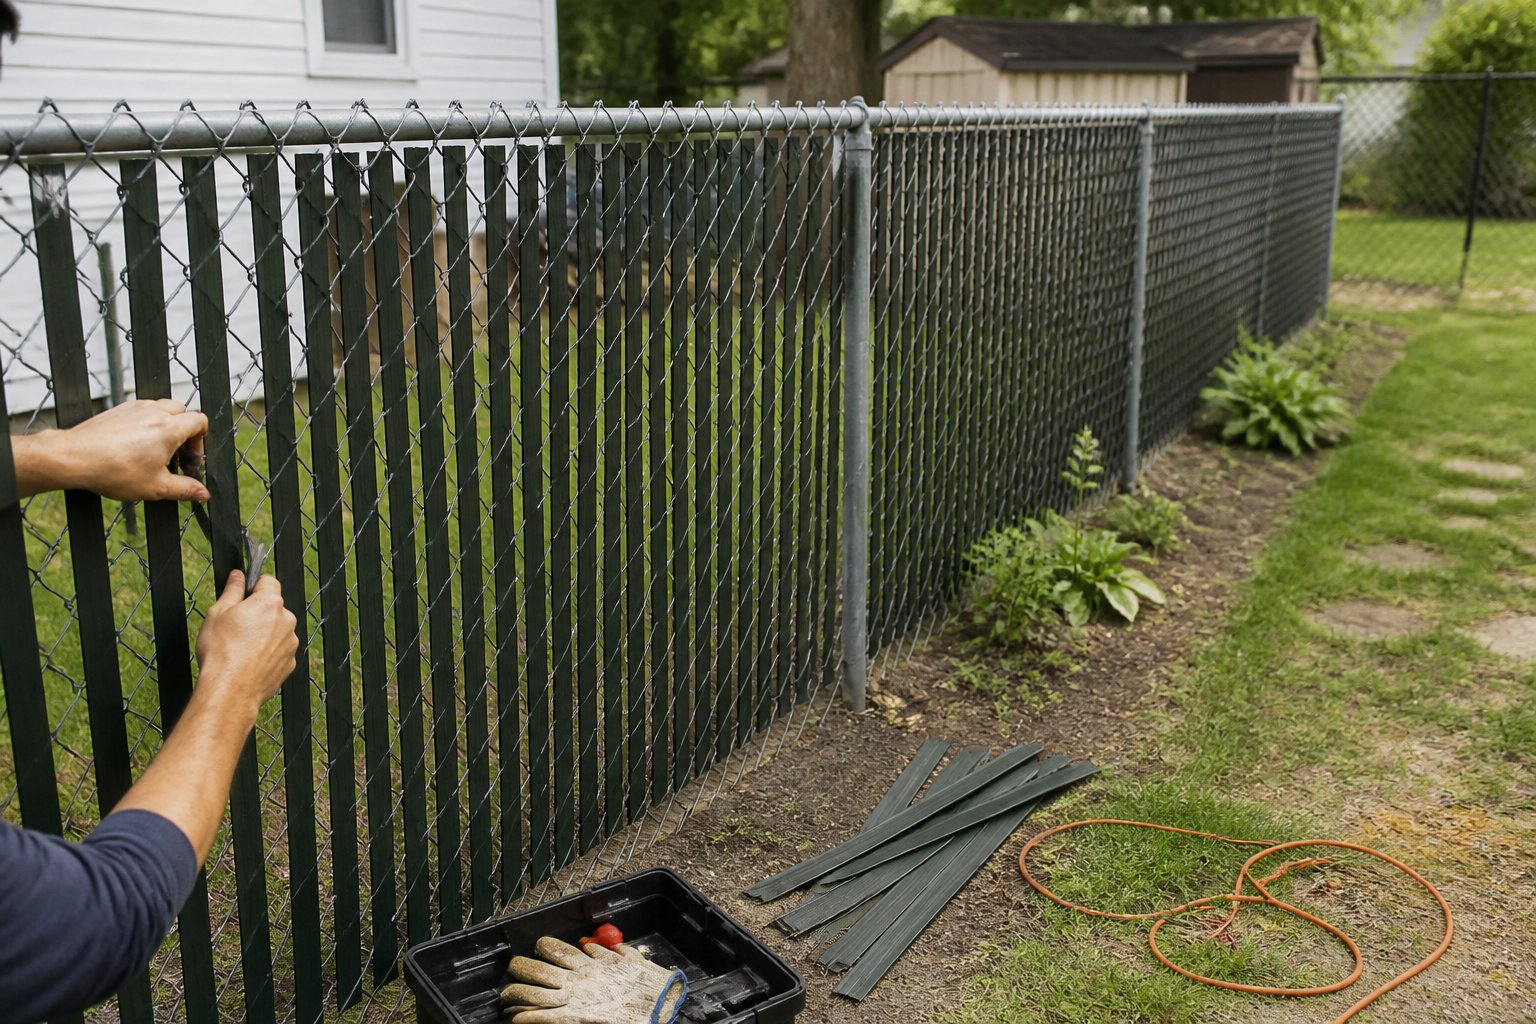
You can turn an existing chain-link fence into a private barrier by weaving vinyl or aluminum slats through the mesh. This approach works well when your posts and rails remain sturdy, and it usually costs less than replacing the fence. Privacy slats can cost about $60 to $150 for a 10-foot section of 6-foot fence, depending on the material and design.
Measure the fence before ordering slats, then check the product’s spacing requirements. Slats that fit loosely may rattle or slip out during strong wind. For a softer look, choose green or brown slats that blend with plants; neutral colors create a cleaner, more modern appearance. Lowe’s covers privacy slats and mesh screens as practical chain-link options.
Install one section at a time, and inspect each connection as you work. Keep the fence gates clear so the added material does not block movement.
7) Wooden fence topper with climbing vines
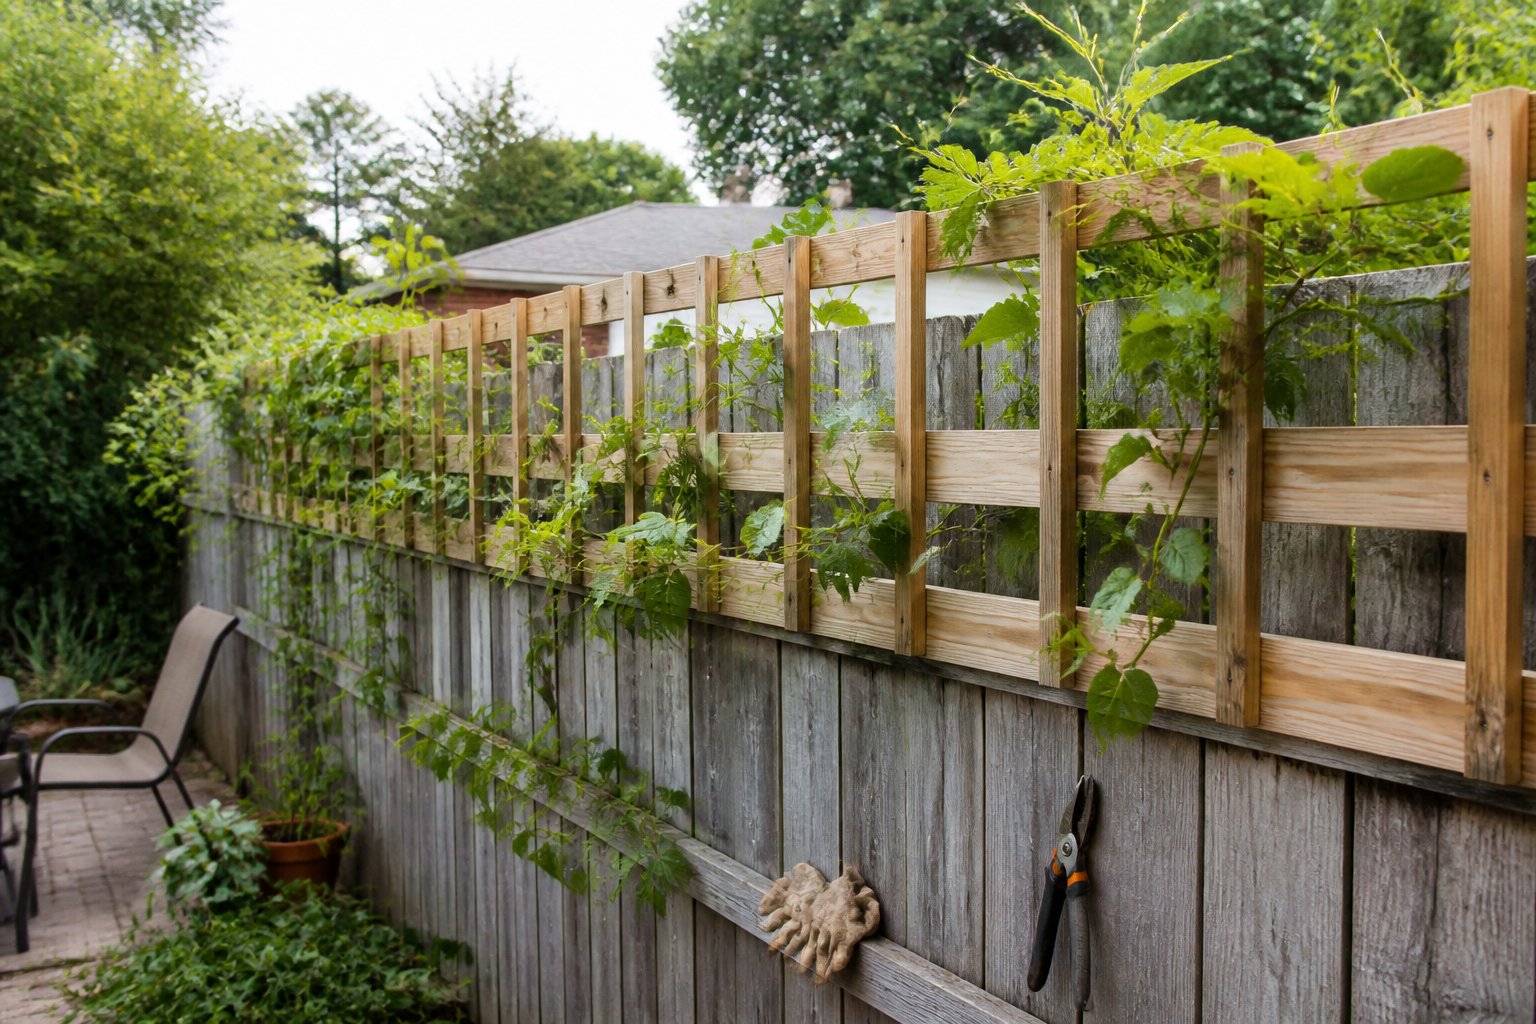
Add a narrow wooden trellis above your existing fence to gain privacy without rebuilding the entire barrier. Use weather-resistant boards or a ready-made trellis, then attach it securely to fence posts with galvanized brackets. A DIY fence-top trellis guide can help you plan the frame.
Choose vines suited to your climate, such as clematis, jasmine, or annual morning glory. Start with small plants to keep costs low, and guide new stems through the trellis as they grow. Avoid letting heavy vines rest directly on weak fence panels.
Leave space between the trellis and fence for airflow, and check local height rules before building. Train the vines regularly so they cover gaps without pulling the topper out of alignment. Begin with a sturdy frame, and your inexpensive privacy screen can improve with each growing season.
8) Outdoor Reed Privacy Fencing
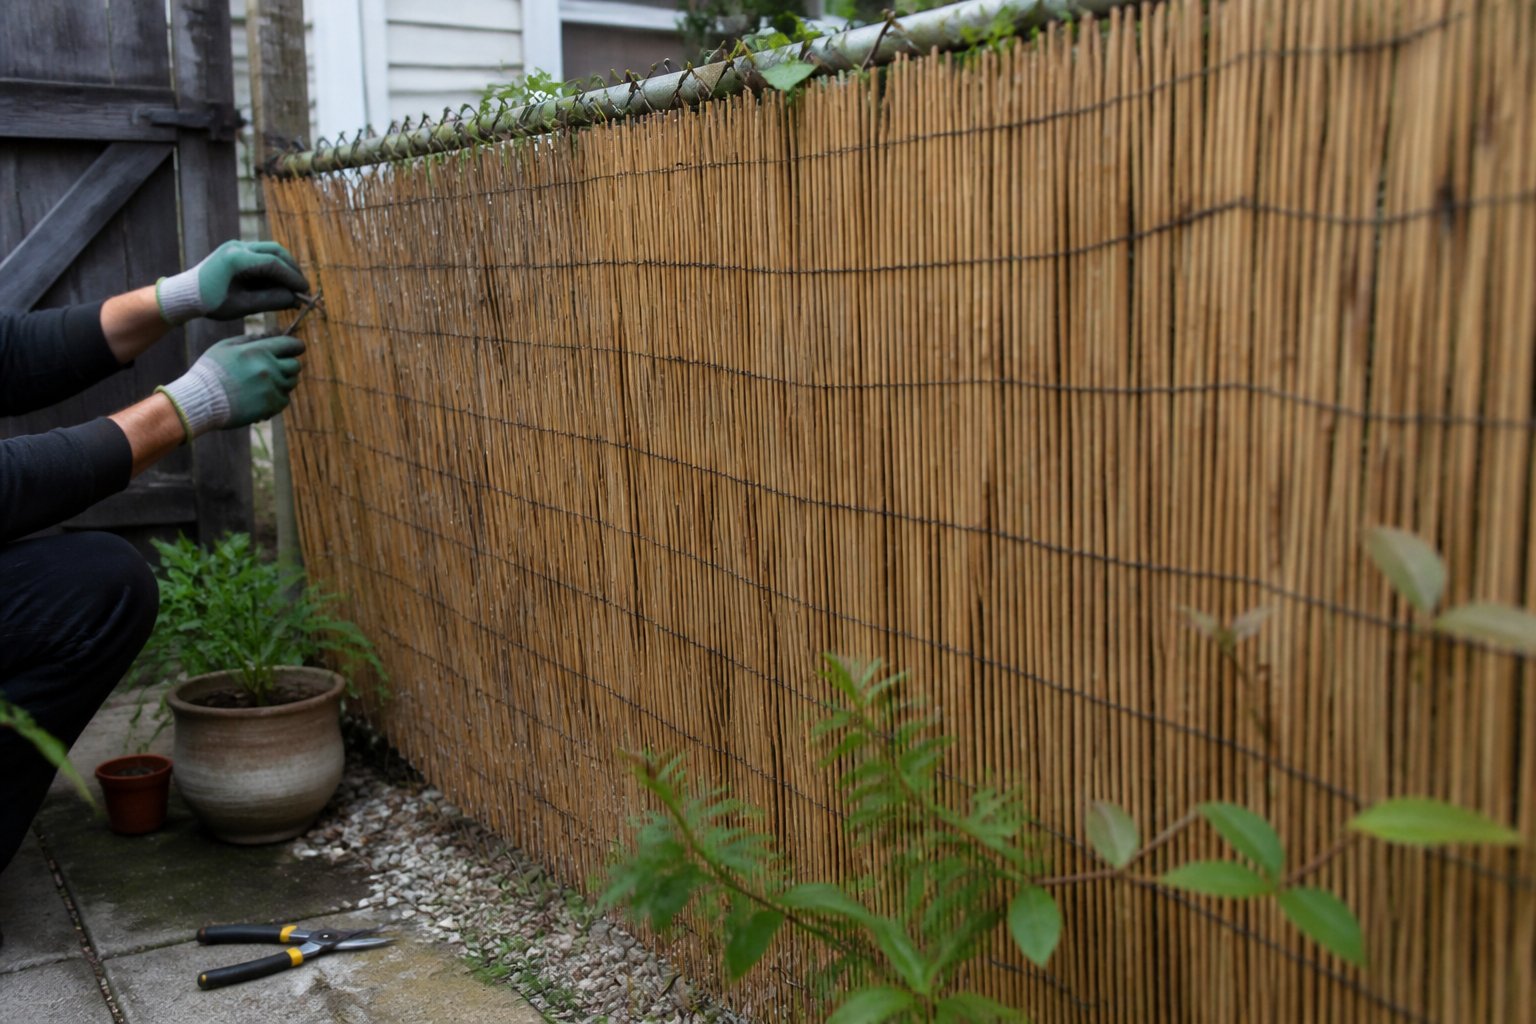
Outdoor reed fencing gives you a quick, natural-looking privacy screen without replacing an entire fence. You can attach reed rolls to an existing chain-link fence, wooden posts, or a simple frame. Reed and bamboo rolls can also cover an unattractive fence with little construction work.
Measure the fence carefully before buying materials. Leave a small gap between the reed and soil so moisture does not cause early rot. Secure the roll every 12 to 18 inches with galvanized wire, outdoor-rated zip ties, or fence staples. Tighten the fasteners, but avoid crushing the reeds.
A common mistake is attaching the screen only at the top and bottom. Wind can pull it loose, especially across wide, open yards. Add center supports and inspect the ties after storms. Trim uneven edges with sharp shears, then cap exposed posts to create a cleaner finish.
9) Salvaged door privacy fence
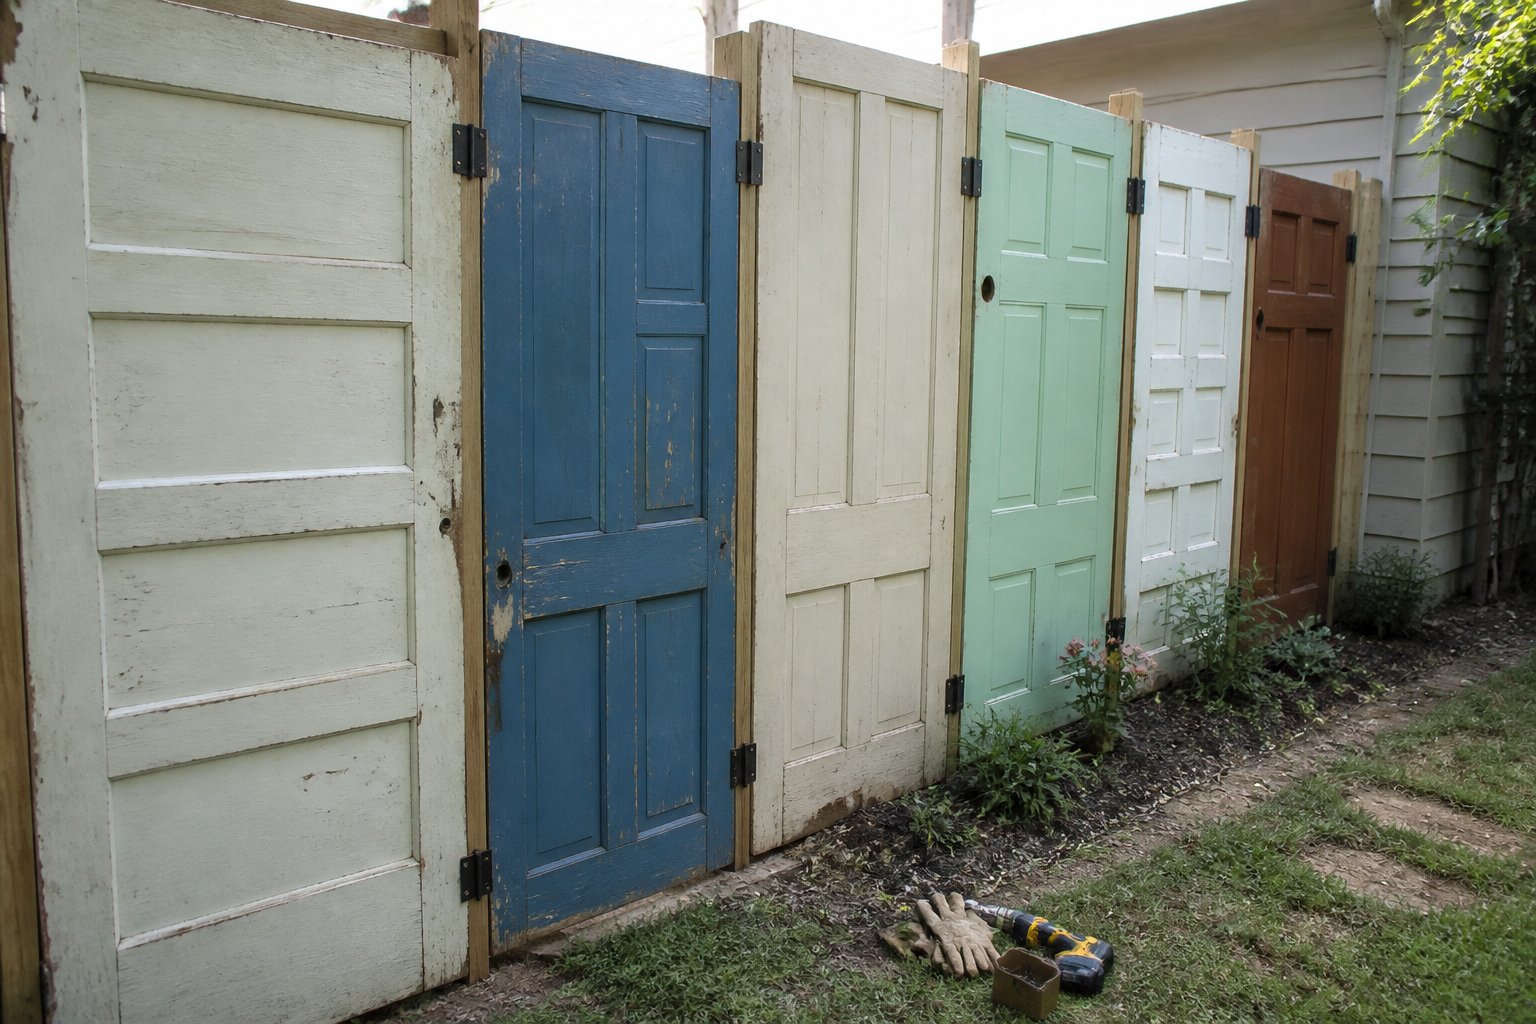
Turn discarded doors into a solid, character-rich privacy fence for a budget-friendly backyard upgrade. You can often find interior doors at salvage yards, reuse centers, or local marketplaces for modest prices. Choose doors with similar heights, then clean, sand, and seal each one before installation.
Set pressure-treated posts in concrete and attach horizontal rails between them. Secure each door with exterior-rated screws, leaving a small gap between panels for drainage and seasonal movement. Paint all the doors one color for a uniform look, or use related shades for a collected style. This idea appears among budget-friendly salvaged door fence designs.
Avoid using hollow-core doors outdoors because moisture can quickly damage them. Check local fence rules, property lines, and post spacing before you build. With careful sourcing, your main costs will involve posts, hardware, paint, and concrete, helping keep the project near $500.
10) Rope-and-post garden privacy barrier
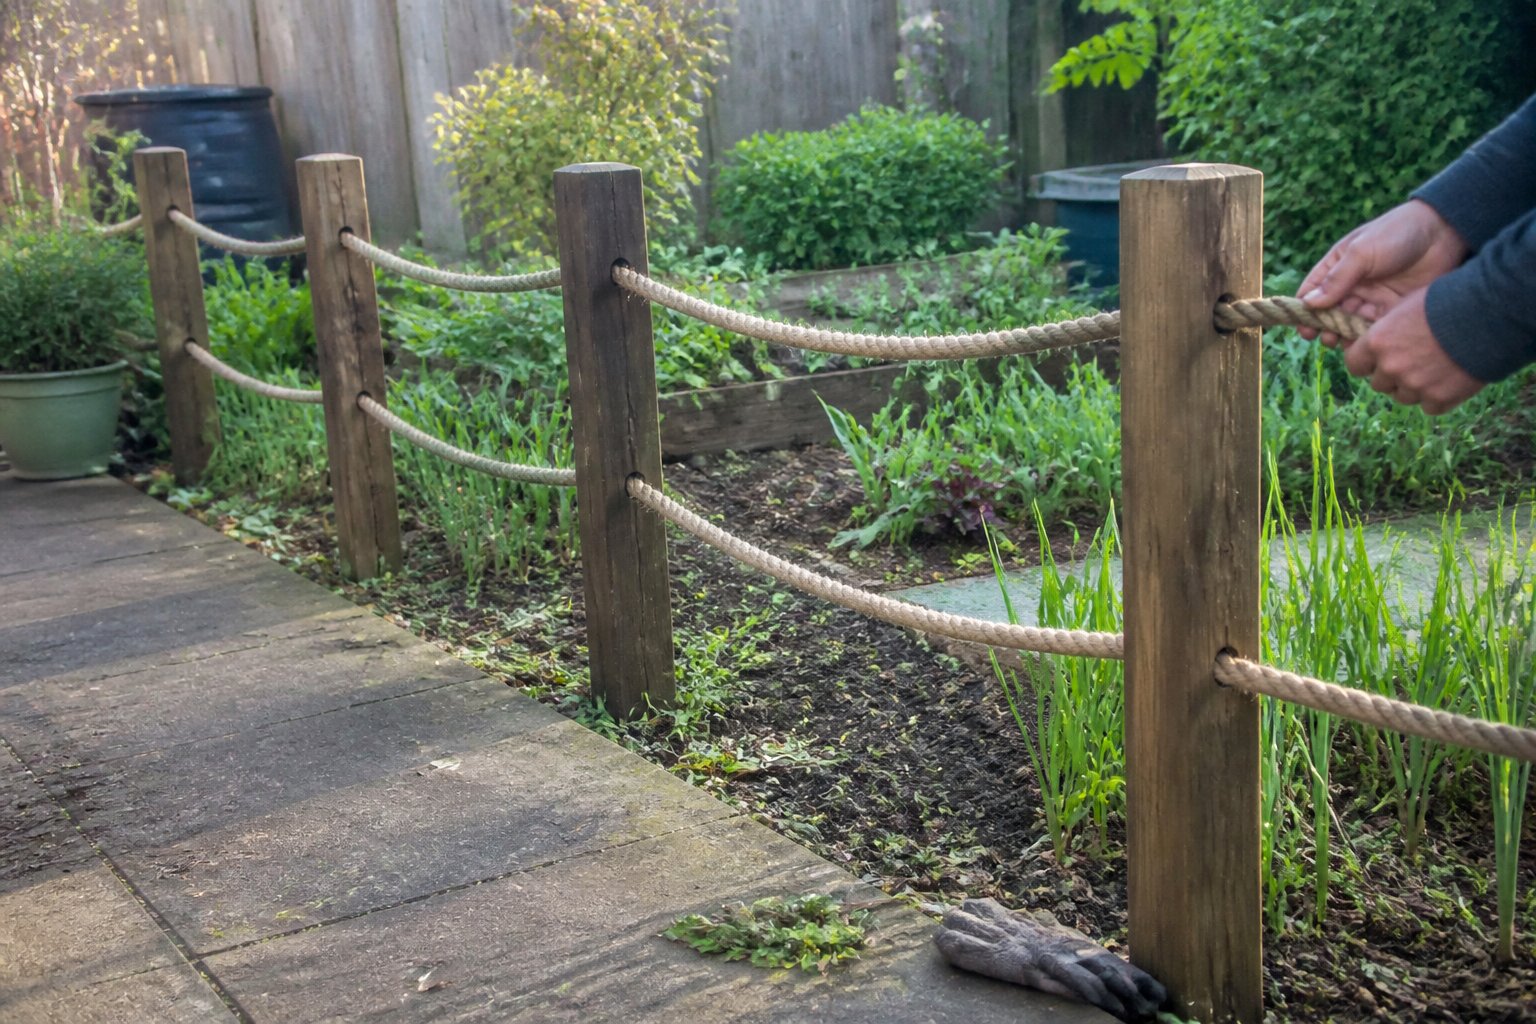
Use this simple guide when you need a flexible, low-cost garden screen rather than a solid fence. Set treated posts along the boundary, then run marine-grade rope between them in several horizontal rows. You can add outdoor fabric, climbing plants, or reed screening for more privacy. A rope-and-post fence can fit a small garden within a modest budget, depending on post spacing and covering.
Keep each post firmly anchored in concrete, especially in windy areas. Space posts closely enough to prevent the rope from sagging, and use eye hooks or cable clamps for secure connections. One common mistake is treating rope as a structural barrier; it mainly supports screening and defines the boundary.
Choose weather-resistant rope and inspect the knots each season. Leave room for plant growth, and avoid blocking gates or access paths. With careful spacing and a durable screen, you can create privacy without making the garden feel closed in.
Planning a Private Fence on a $500 Budget
A private fence under $500 requires accurate measurements, a simple layout, and careful rule checking. You can protect your budget by confirming the fence line before buying materials and choosing a design that fits your yard’s actual dimensions.
Measuring the Perimeter and Calculating Material Needs
Measure each fence run separately instead of guessing the full perimeter. Record the length of every side, then add the numbers to find the total linear footage. Mark planned gates separately because they need posts, hinges, latches, and framing.
Use your measurements to estimate materials:
- Posts: Place posts about 6 to 8 feet apart, depending on the fence design and local conditions.
- Panels or pickets: Divide each fence run by the panel width, then round up.
- Concrete: Plan for one bag or more per post, based on the hole size and soil.
- Hardware: Include screws, brackets, hinges, a latch, and post caps.
- Waste: Add about 10% for cuts, damage, and small errors.
For example, a 40-foot run using 8-foot panels needs five panels, but you may need six if the gate or corner changes the layout. Price the complete list before choosing materials. Budget-friendly fence plans can help you compare low-cost layouts and materials.
Checking Property Lines, Permits, and HOA Rules
Do not place a fence directly on a suspected property line without checking first. Review your property survey, look for known markers, and contact your local zoning office if the boundary remains unclear. A misplaced fence can create a costly dispute or force you to move the work.
Ask your city or county whether you need a permit. Rules may control fence height, setbacks, corner visibility, and distance from sidewalks or utility areas. Call 811 before digging to locate underground utility lines, even for a short fence.
If you belong to a homeowners association, check its rules before buying materials. Some associations restrict wood type, paint color, fence height, and placement. Save written approvals and keep copies of permits with your project records. This planning prevents a low-cost fence from becoming an expensive correction.
Installation, Safety, and Long-Term Upkeep
A low-cost privacy fence works best when you protect its weakest points: the posts, fasteners, and exposed wood. Careful alignment, proper drainage, and regular inspections help prevent leaning panels, rot, and avoidable repairs.
Building Stable Posts and Secure Panels
Mark each post location before you dig, and check local rules for property lines, height limits, and underground utilities. Set posts at consistent spacing that matches your panel width. For most wood privacy panels, posts need firm support and should extend below the local frost line when required.
Use gravel beneath each post to improve drainage, then add concrete around the post if the design and soil conditions call for it. Keep the post plumb while the concrete sets. A common mistake is attaching panels before checking the entire fence line with a level and string.
Fasten panels with exterior-rated screws, not indoor screws or a few nails. Add blocking or a center rail if a panel flexes in the wind. Leave a small gap between the bottom edge and soil, and use a gate brace that runs from the lower hinge side toward the upper latch side.
Weatherproofing Budget Materials for Lasting Privacy
Seal cut ends of lumber before installation, especially the bottoms of posts and freshly cut panel edges. Apply an exterior stain or paint rated for fences, and follow the label’s drying and recoat times. Treat bamboo, reed, or pallet wood with a suitable outdoor sealer, but inspect reclaimed wood first for rot, insects, nails, and chemical treatment.
Keep sprinklers from spraying the fence. Trim vines and shrubs so they do not trap moisture against the panels. Each spring, check for loose screws, cracked boards, leaning posts, rust, and standing water.
For inexpensive materials, maintenance matters more than appearance alone. Replace damaged boards promptly, clear leaves from the fence base, and reseal exposed surfaces before water enters the wood. Use budget-friendly fence materials and designs as a starting point, then choose options that fit your soil, weather, and privacy needs.